

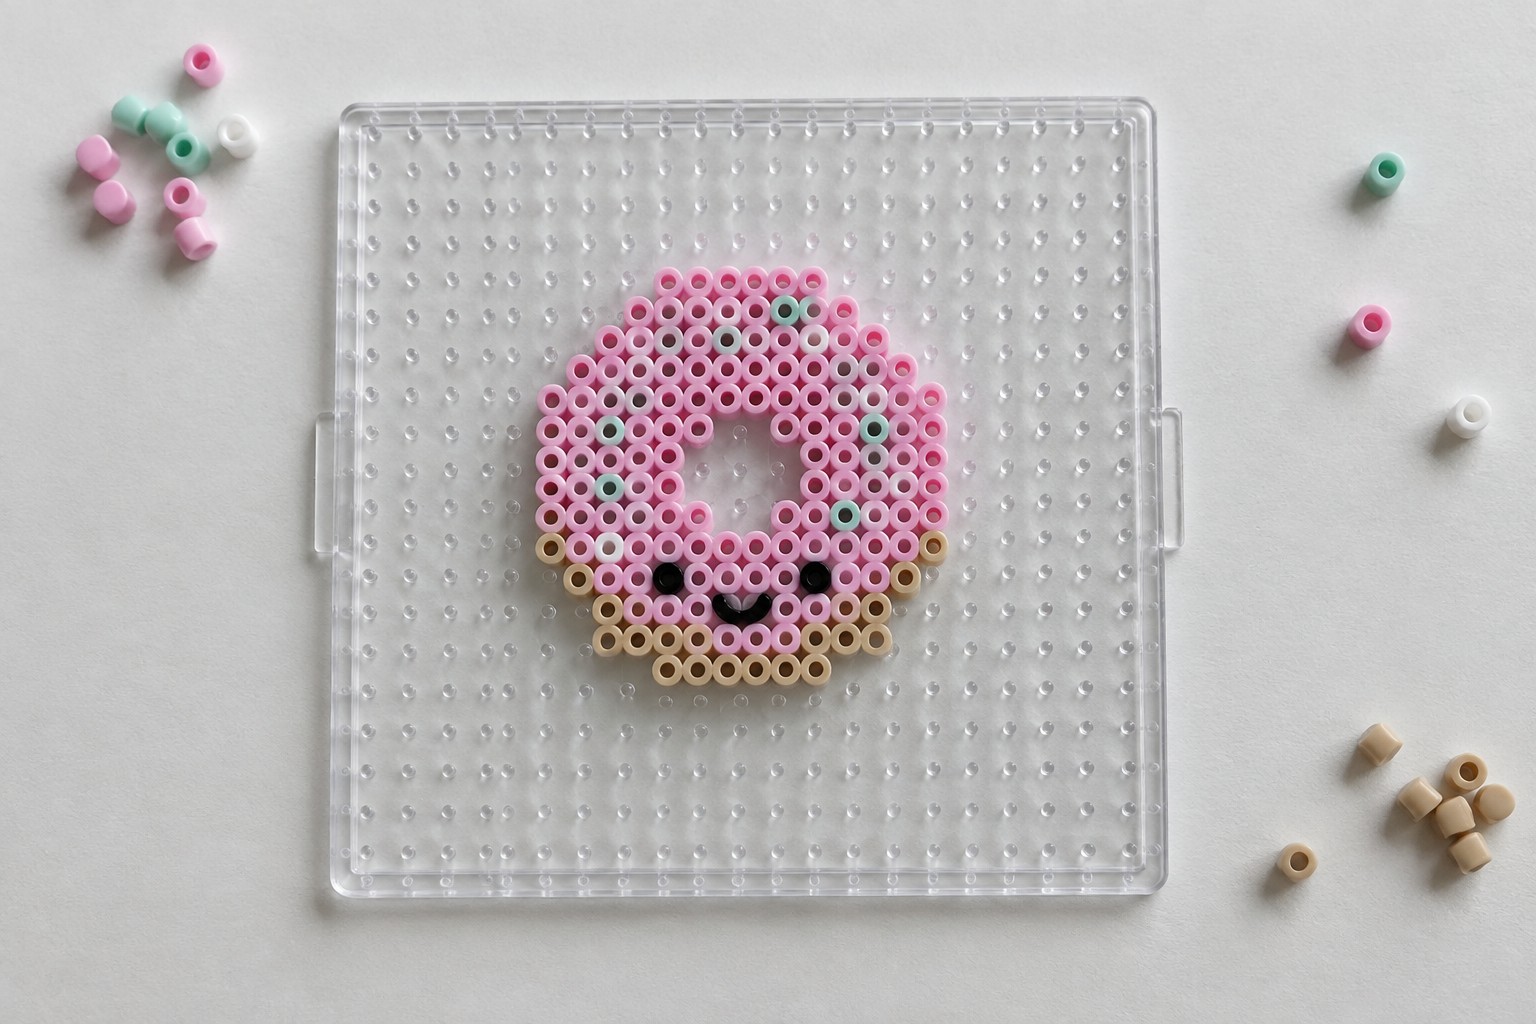
I enjoy making small Perler bead patterns that look like tiny foods.
These designs use basic shapes and colors to suggest things like fruits or baked goods.
They stay compact so the finished pieces feel like miniature versions rather than full size crafts.
I collected twenty patterns that focus on cute treat ideas.
They are simple enough to set up on a pegboard when you want something quick to try.
Mini Donut Face Pattern
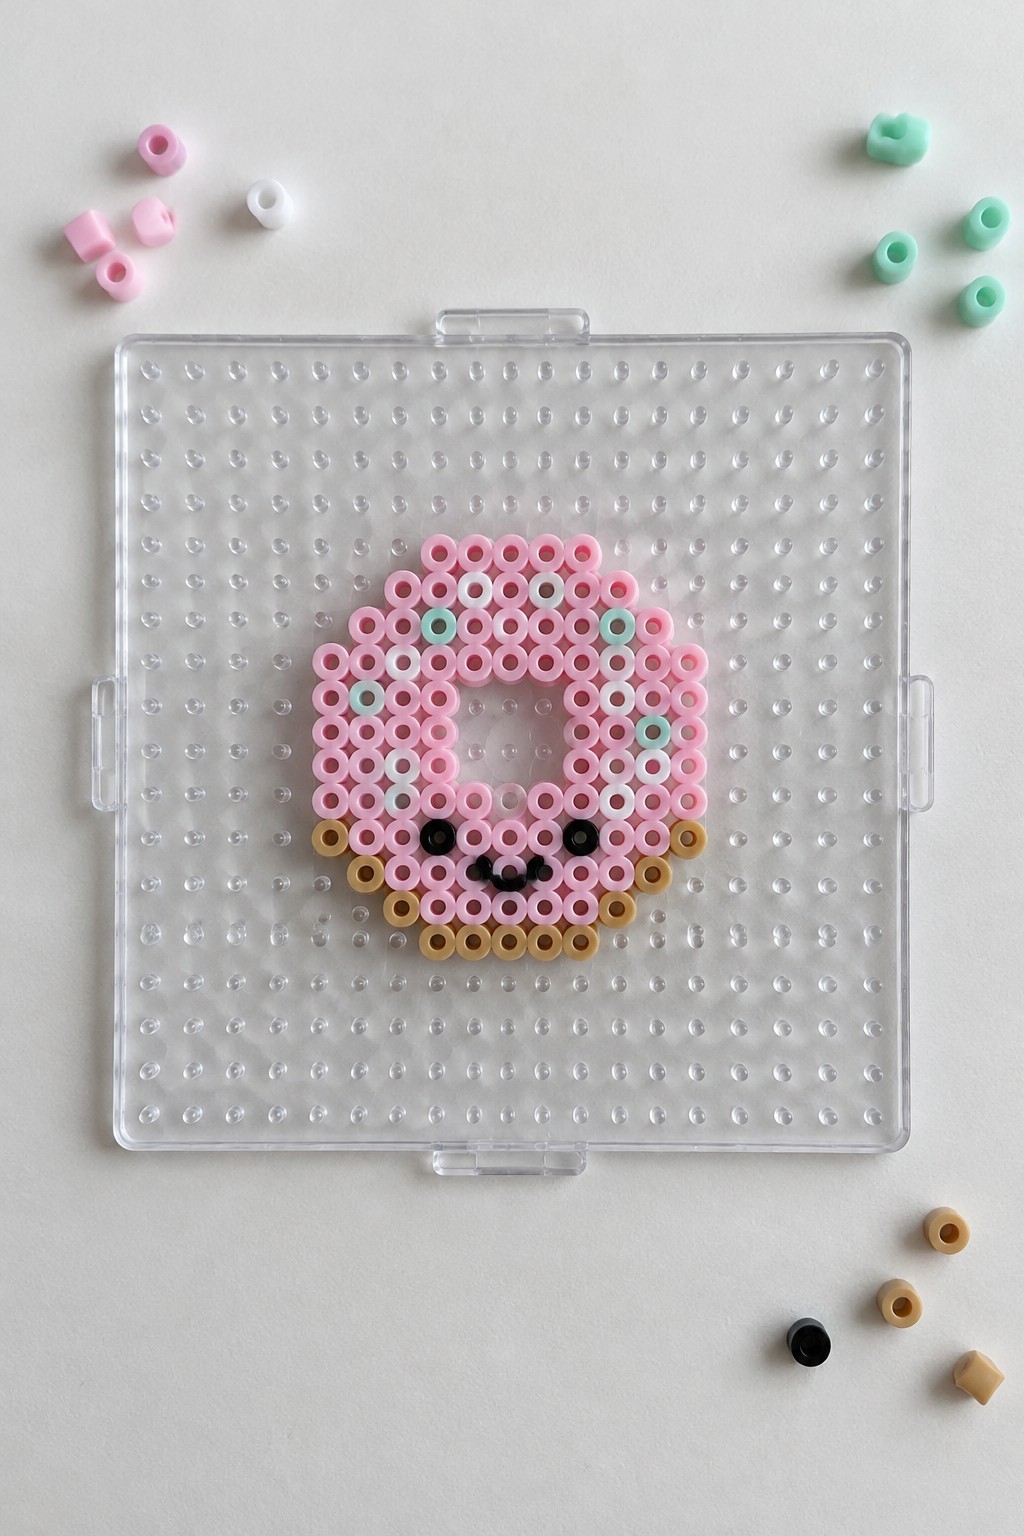
A ring-shaped donut emerges from concentric rows of pink beads with an open center and a rounded outline. Brown beads line the bottom edge while black beads form two small eyes and a simple curved mouth. A few mint green and white beads placed along the upper curve suggest sprinkles against the pink surface.
The compact scale uses a small number of beads to create a clear food shape that reads instantly. Switching the pink beads for other pastel colors lets you build a set of different donut flavors from the same layout. A finished version this size fits easily on a keychain or as a fridge magnet.
Mini Cupcake Perler Bead Pattern
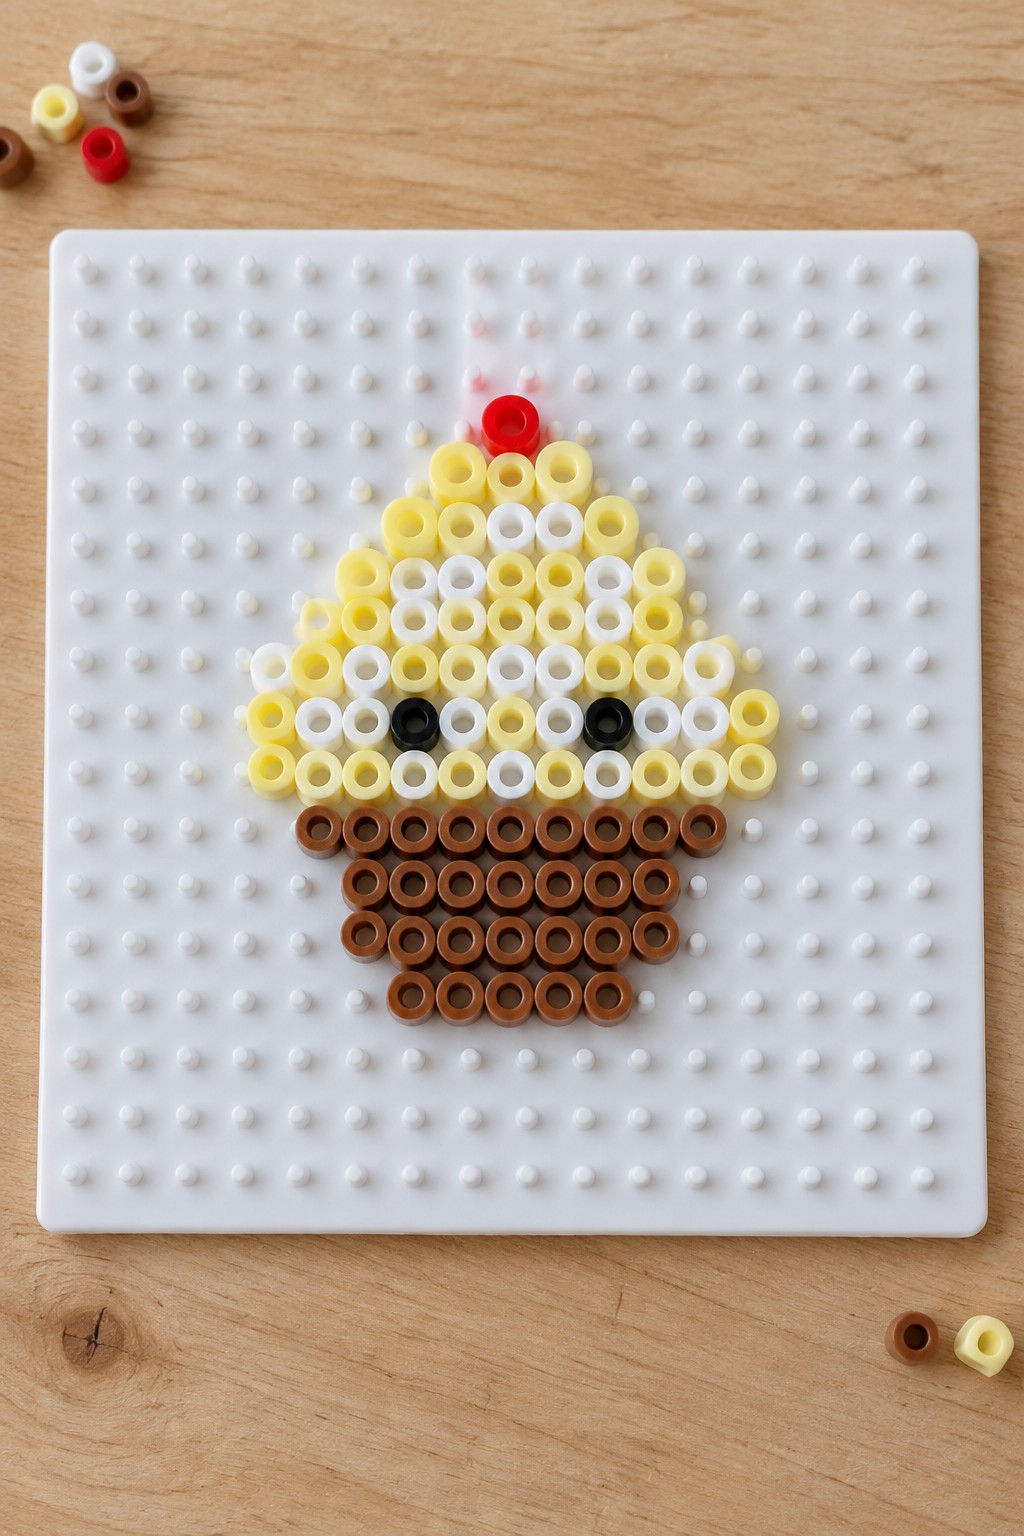
A Perler bead cupcake uses rows of yellow and white beads arranged in a stepped pyramid to suggest swirled frosting above a solid brown base that forms the cake cup. A single red bead sits at the top as a cherry while two black beads create simple eyes that give the design a kawaii face. The clear color blocks between the lighter frosting shades and the darker brown rows, combined with the pixel-style outline, make the miniature food shape easy to recognize on the pegboard.
The small overall size works well for turning the finished piece into a magnet or bag charm after fusing. Changing the yellow beads to pink or adding a few extra colors for sprinkles produces quick flavor variations without altering the basic layout. The same silhouette can be repeated with different base colors to build a set of coordinated miniature treats.
Mini Ice Cream Cone
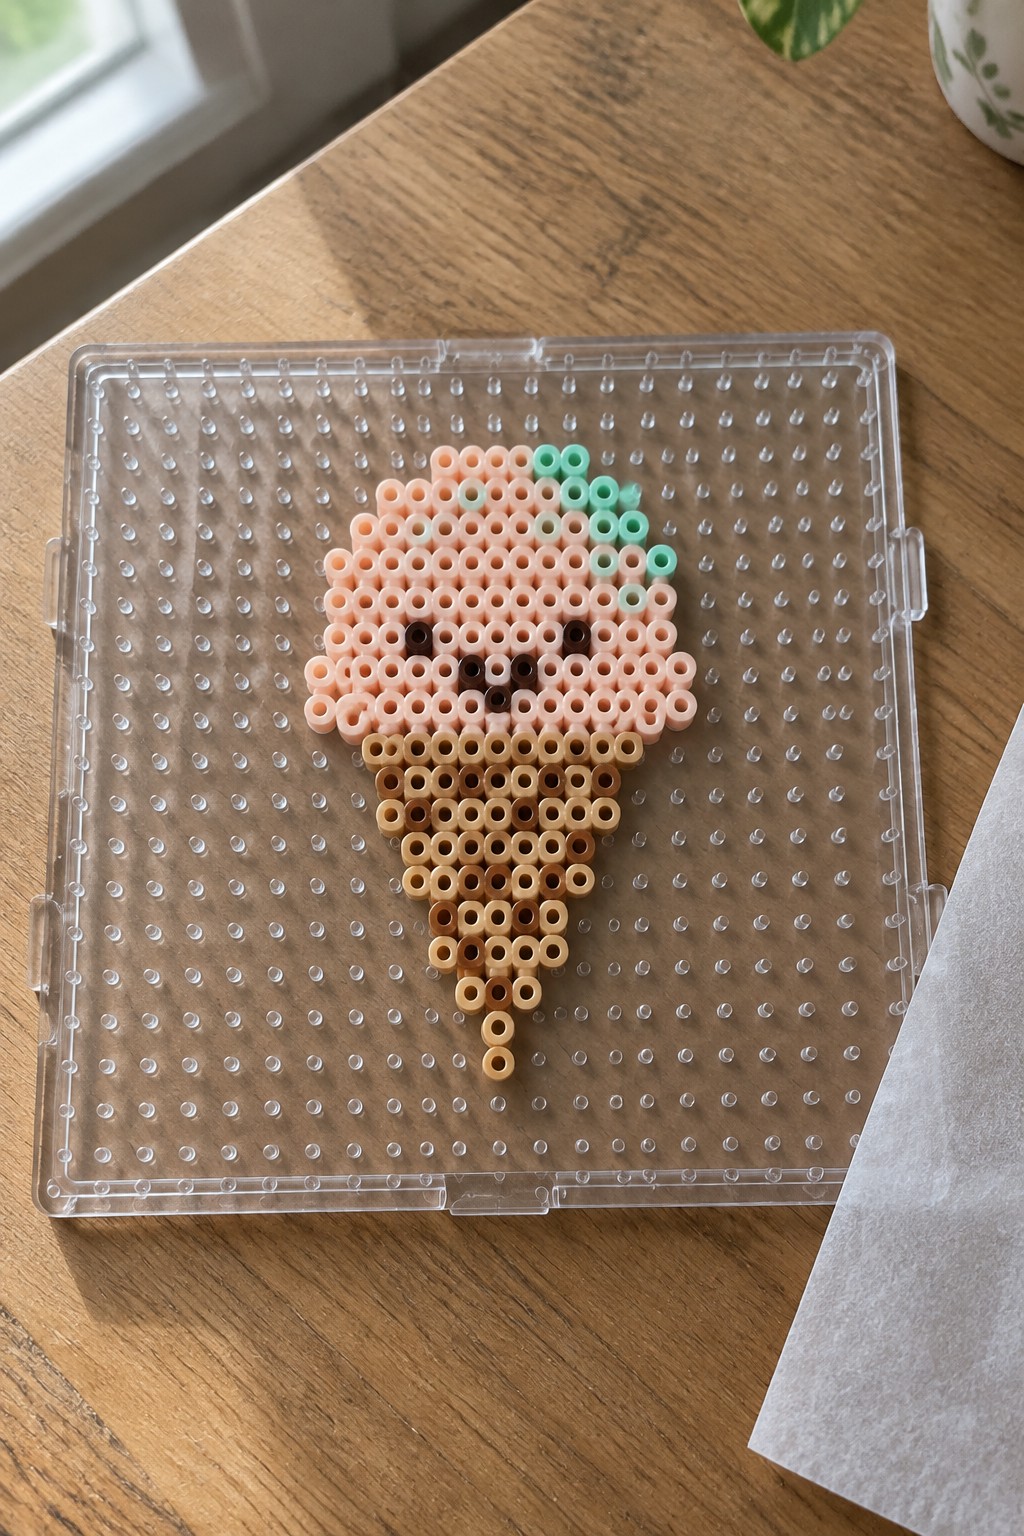
This Perler bead pattern forms a flat ice cream cone using a single pink scoop layered over a tapered brown cone. The pink section uses uniform bead placement to create a rounded top, while mint green beads form small accent shapes along the upper edge to suggest sprinkles or a second flavor. Two dark brown beads create simple eyes and a curved mouth on the pink area, and the cone uses graduated brown shades with a single dangling bead at the bottom to represent a drip. The clear pegboard layout keeps the design compact and easy to follow row by row.
The limited color palette and clear color blocking make the cone shape instantly recognizable even at small scale. You can swap the pink for other pastel shades to represent different ice cream flavors or change the mint accents to rainbow colors for variety. A finished piece this size works well as a magnet, bag charm, or part of a larger food-themed set. The same basic outline could be adapted into a single-scoop version or paired with a matching donut or cupcake pattern.
Mini Macaron Perler Bead Treats
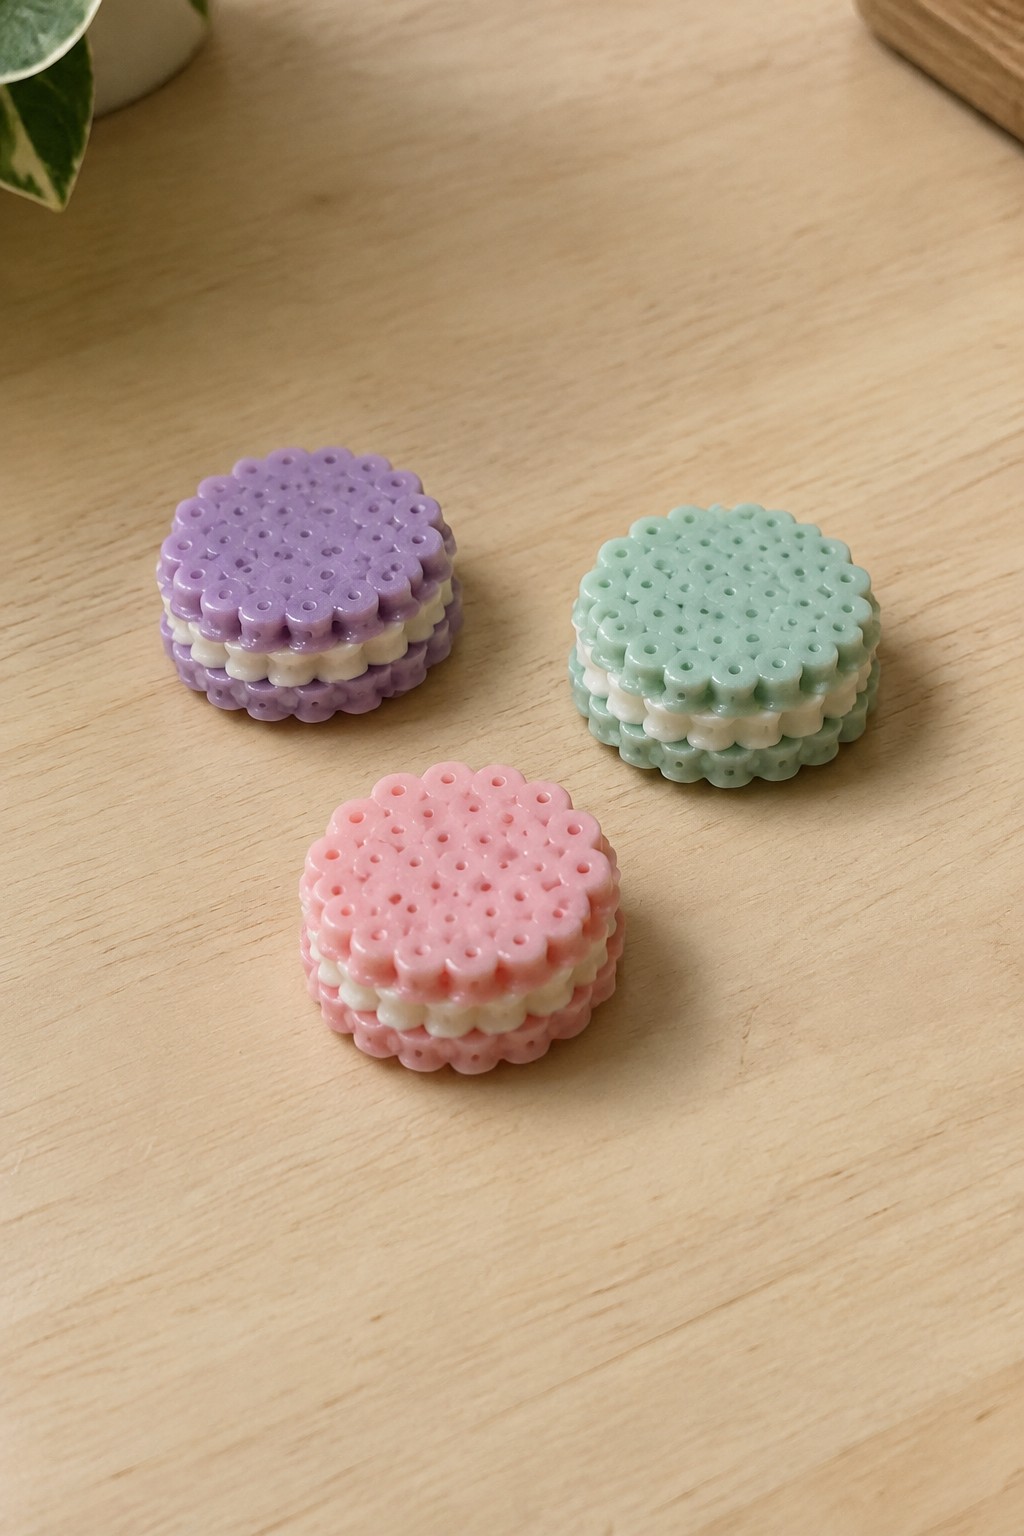
These Perler bead projects form miniature macarons by stacking two scalloped round layers with a white middle section to represent the filling. The top and bottom shells use pastel purple, mint green, and pink beads arranged in a dotted pattern that creates texture without adding extra colors. The compact round shape and clear color blocking make each piece read instantly as a small sandwich cookie or macaron.
The limited bead count keeps the design quick to lay out while still producing a recognizable food shape. You can easily swap the shell colors for other pastels or create matching sets by varying just the top color on each one. A finished stack could work as a bag charm, display accent, or part of a larger miniature food scene.
Cake Slice Perler Bead Pattern
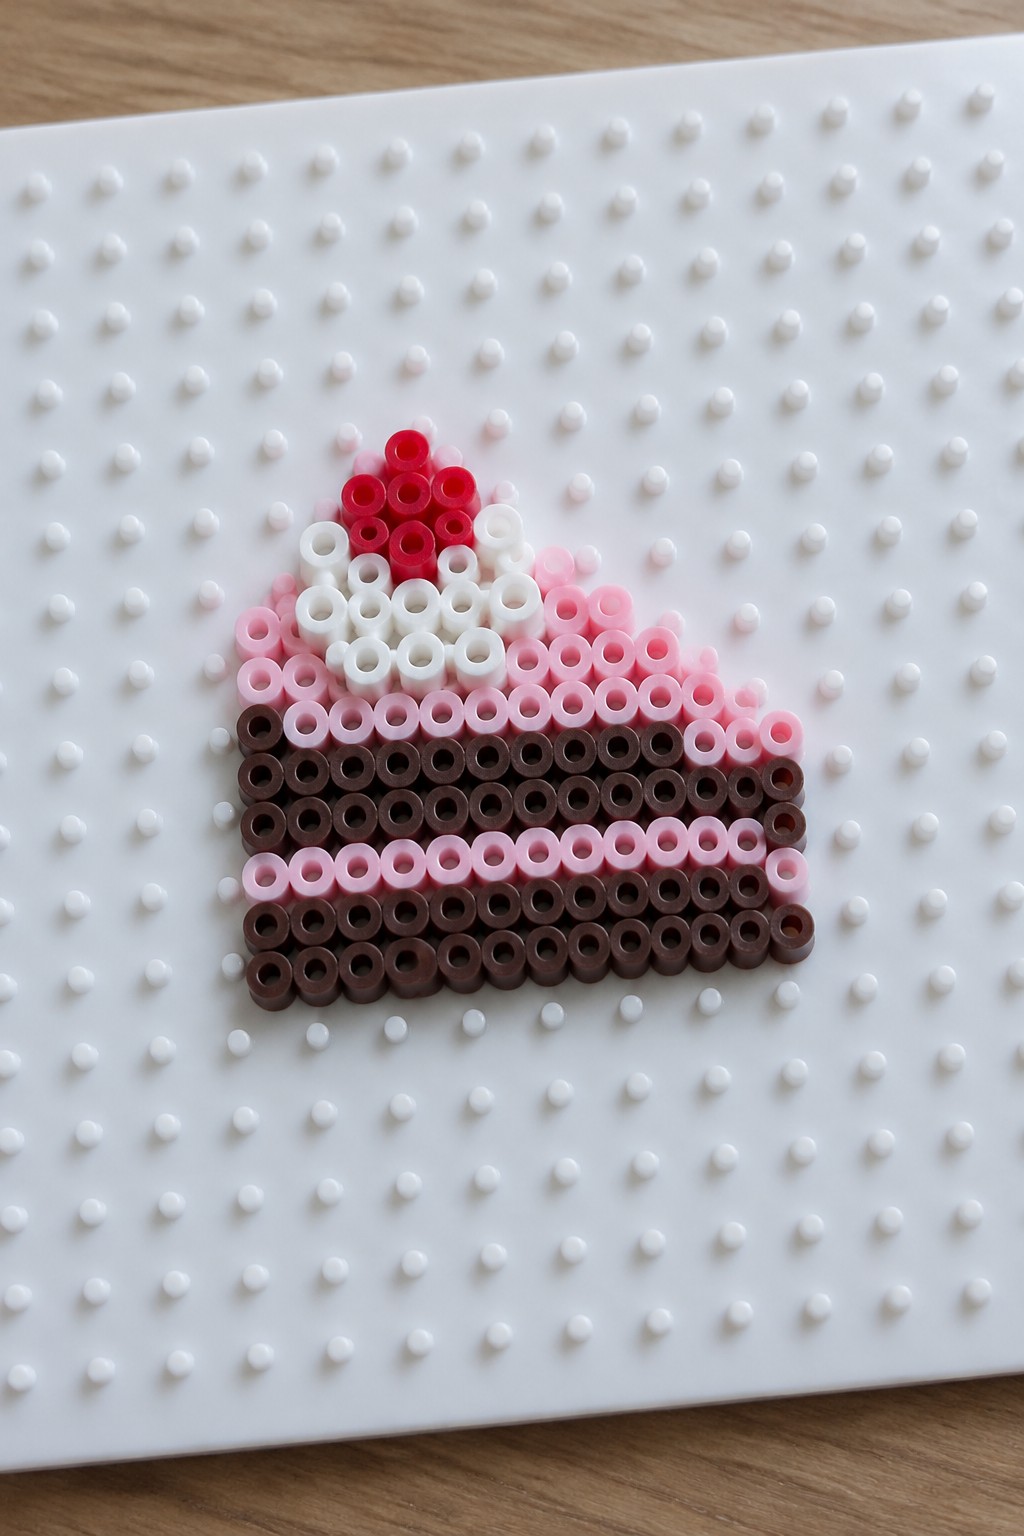
A cake slice Perler bead pattern builds the dessert shape through horizontal rows of brown beads for the cake base and pink beads for the frosting layer above it. White beads add a highlight band along the top of the frosting while red beads form the cherry at the peak. The stepped silhouette created by the bead placement gives the slice its recognizable triangular form without needing extra outline beads.
The contrasting bead colors make each layer distinct so the design reads clearly even when small. You could change the pink frosting to yellow or lavender to suggest different cake flavors while keeping the same layout. A finished piece from this pattern could serve as a magnet or bag charm in a set of miniature food designs.
Chocolate Chip Cookie Perler Bead Pattern
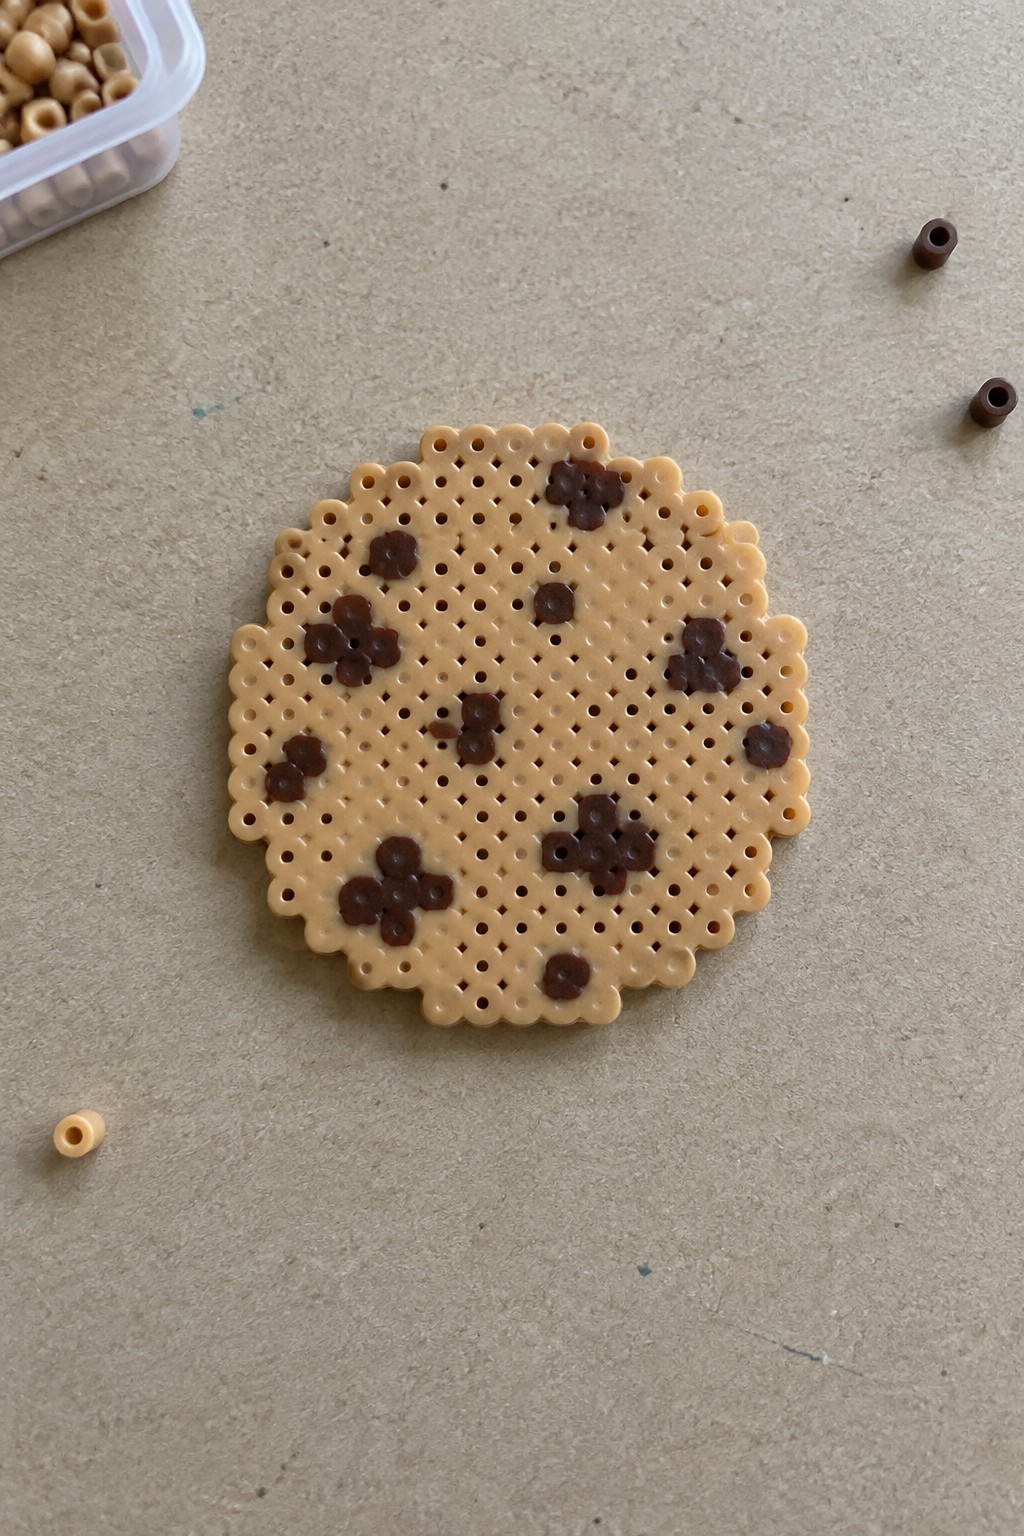
This Perler bead arrangement forms a small round cookie using tan beads for the base and brown beads clustered in groups of three or four to stand in for chocolate chips. The circular layout with a slightly scalloped edge follows the natural shape of a baked cookie, while the scattered brown placements create an irregular chip distribution that reads clearly from a distance. The design stays flat on the pegboard and relies on simple color blocking rather than fine details to convey the food motif.
The small circular shape makes this pattern easy to scale up or down depending on the pegboard size available. Changing the brown beads to other shades would let you make different cookie types such as peanut butter or sugar cookies with sprinkles. A finished piece this size works well as a magnet, bag charm, or part of a larger miniature food display. The same basic layout can be repeated with slight chip variations to build a quick matching set.
Pizza Slice Perler Bead Pattern
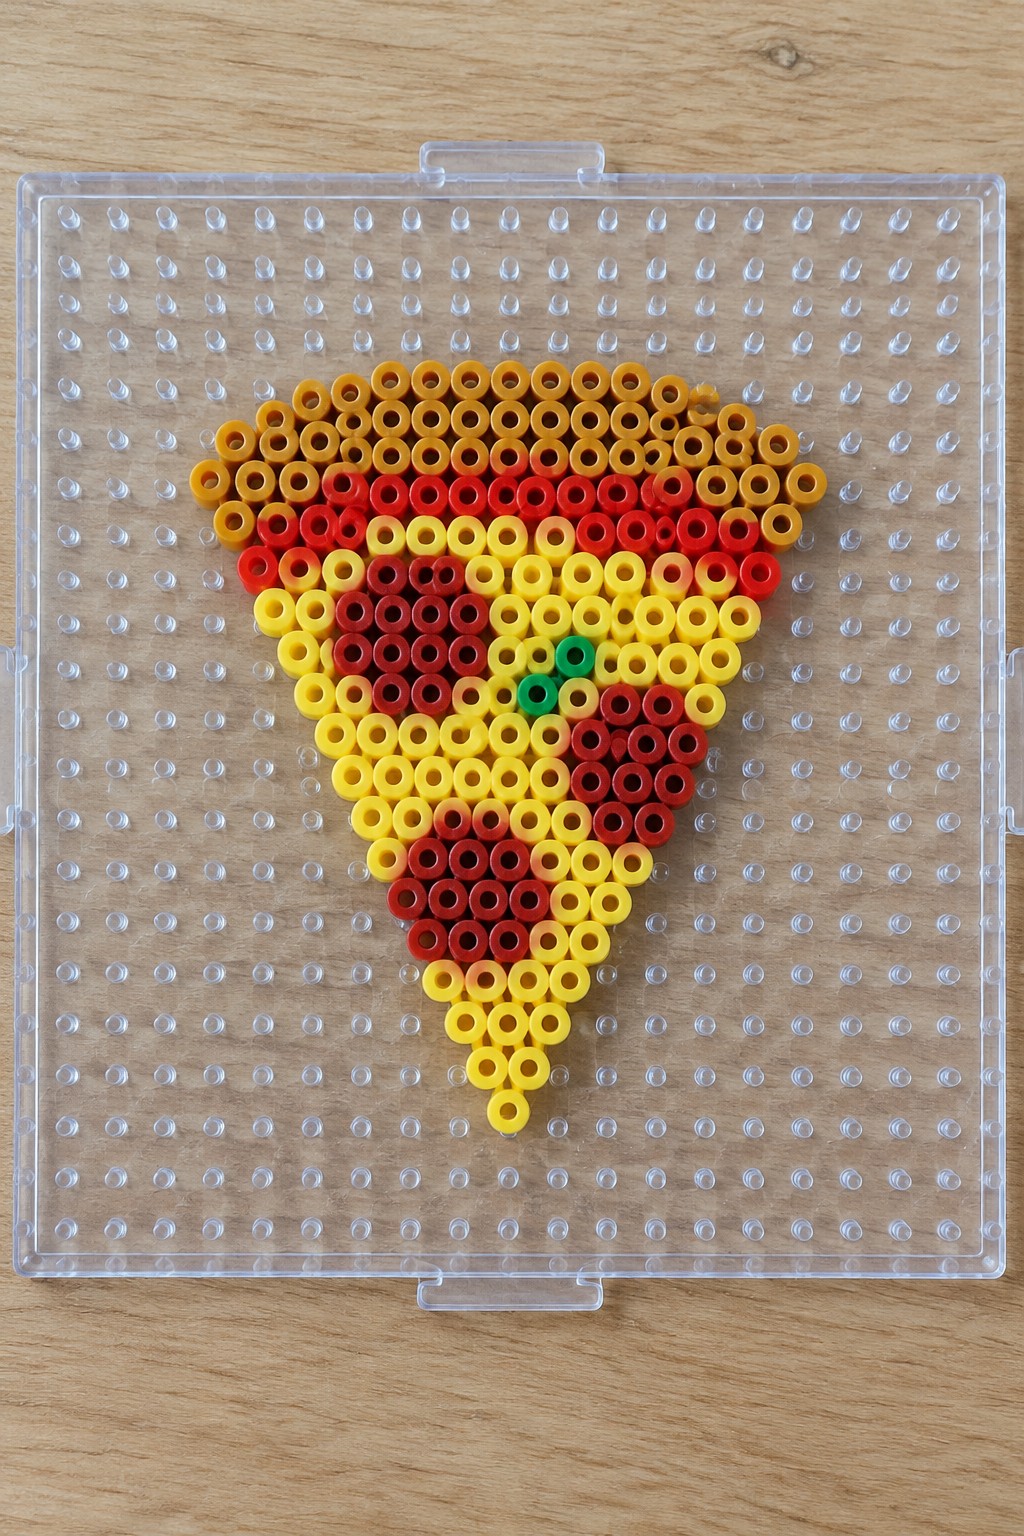
This Perler bead arrangement forms a flat pizza slice using rows of yellow beads for the cheese layer, scattered red beads to suggest pepperoni, and orange beads along the outer edges for the crust. The triangular shape is created through stepped rows that narrow toward the tip, with a single green bead placed near the center as a small topping accent. The design relies on clear color blocking and a simple grid layout on the pegboard to keep the food motif easy to read.
The compact scale and limited color palette make this pattern quick to recreate or resize for different projects. You could change the red beads to other topping colors or add more green accents to create a set of variations. A finished piece this size works well as a magnet or small decorative accent for a kitchen display.
Mini Sushi Roll Keychain
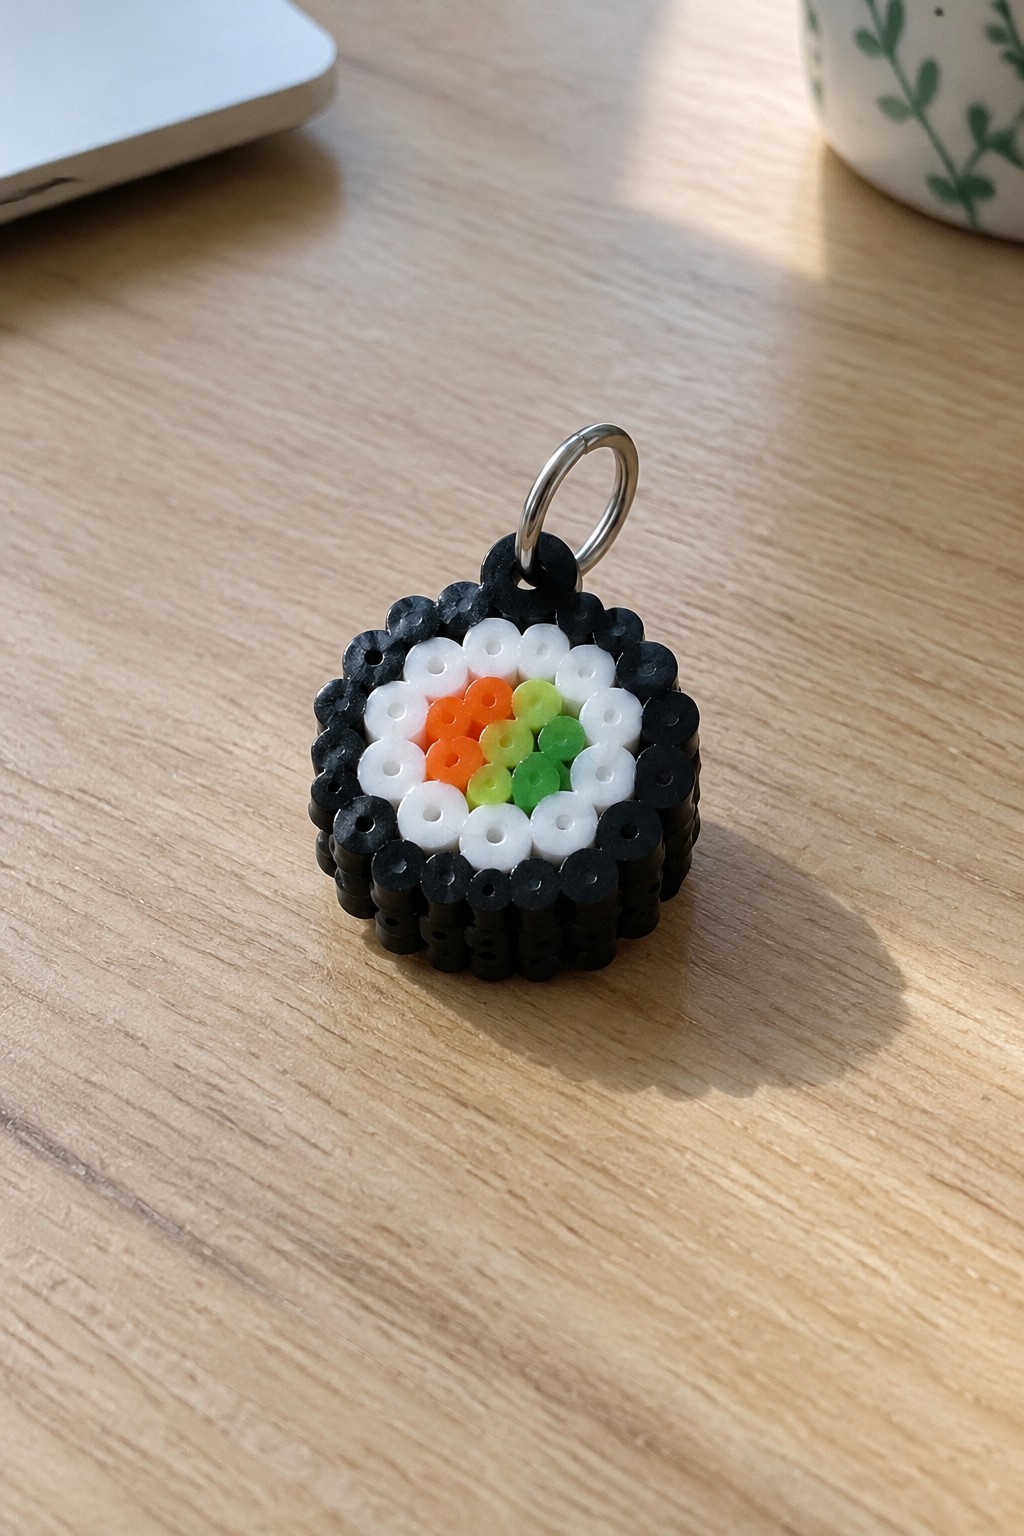
This Perler bead project uses a circular arrangement of black beads to form the outer nori layer around a ring of white beads representing rice. The center features small clusters of orange, green, and lime beads to suggest typical sushi fillings like carrot or salmon and avocado. A metal keyring is attached through one of the top black beads, turning the finished fused piece into a functional charm. The tight concentric layout and limited color blocks keep the sushi shape clear even at a small scale.
The round silhouette works especially well for miniature food patterns because it uses relatively few beads while still reading as a complete roll. Changing the center colors could easily produce different sushi varieties or even shift the design toward other round treats like a donut or cookie. A finished piece this size attaches naturally to a keyring, zipper pull, or bag without needing extra hardware. The same basic ring structure could also be adapted into matching pieces for a set of different food charms.
Mini Strawberry Keychain
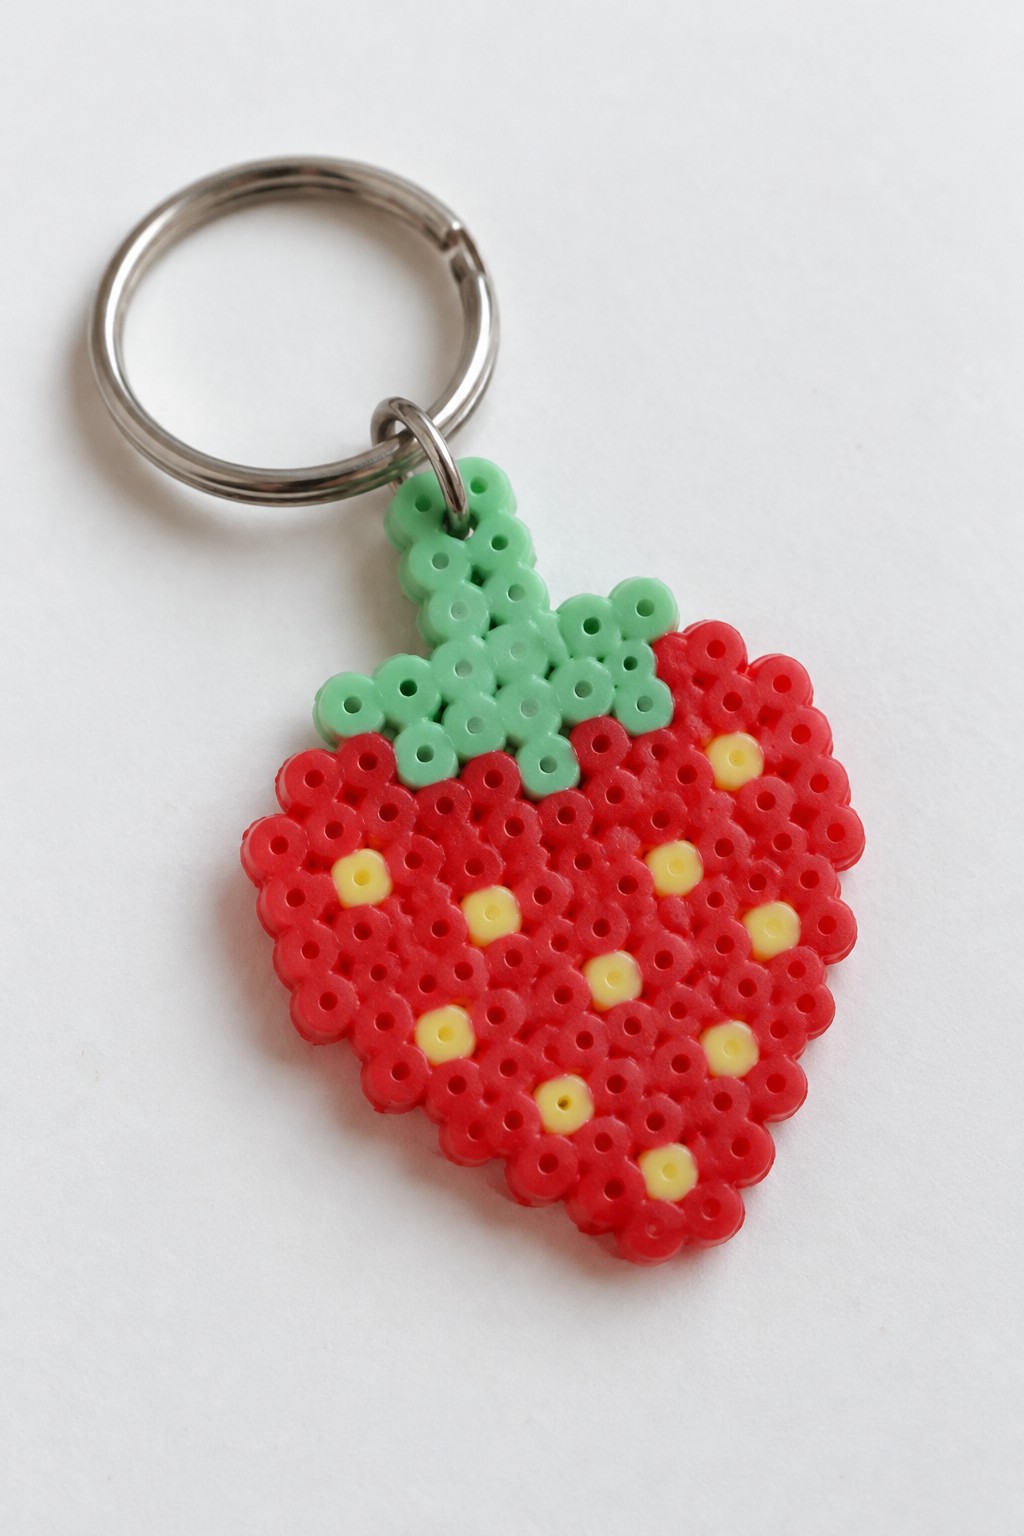
A strawberry shape built from red, green, and yellow Perler beads creates a finished keychain. Red beads form the rounded body with individual yellow beads placed as seeds, while green beads build the leafy top and stem section. The metal ring threads through several beads at the top, turning the flat fused piece into a functional item. The color blocks and stepped outline keep the fruit shape clear despite the small size.
The limited bead count makes this pattern quick to lay out once the shape is planned on paper. Changing the red to pink or purple would turn it into a different berry while keeping the same layout. A finished piece like this works well clipped to a bag or used as a zipper pull because the fused surface stays flat and lightweight.
Cute Watermelon Slice Perler Bead Design
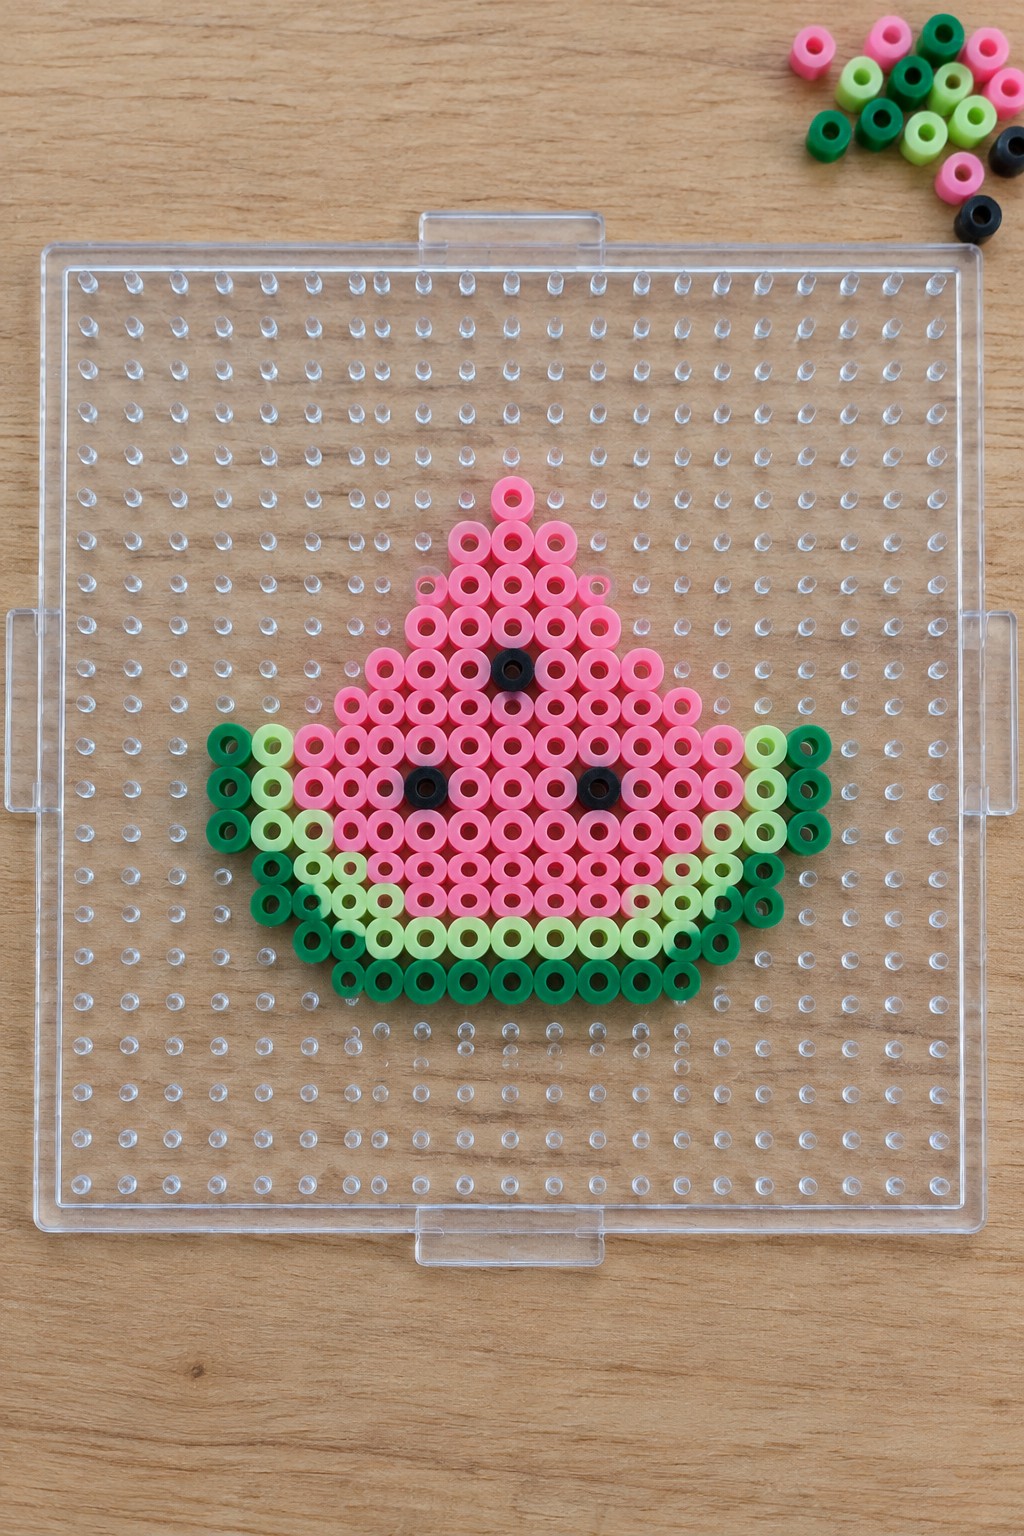
A watermelon slice Perler bead pattern uses pink beads to fill the interior, with two black beads forming simple eyes and a short row of black beads creating a mouth. Layered shades of green beads outline the rind along the curved bottom and sides, while scattered black beads act as seeds. The clear color blocking and stepped edges around the pink section help the slice shape stand out on the pegboard.
The compact size and few color zones make this pattern easy to adjust by swapping the pink for another fruit shade or adding extra seeds. Finished versions suit small magnets or bag charms in a miniature food set. Repeating the same rind structure with different interior colors produces quick matching pieces for a larger collection.
Cute Milkshake Perler Bead Pattern
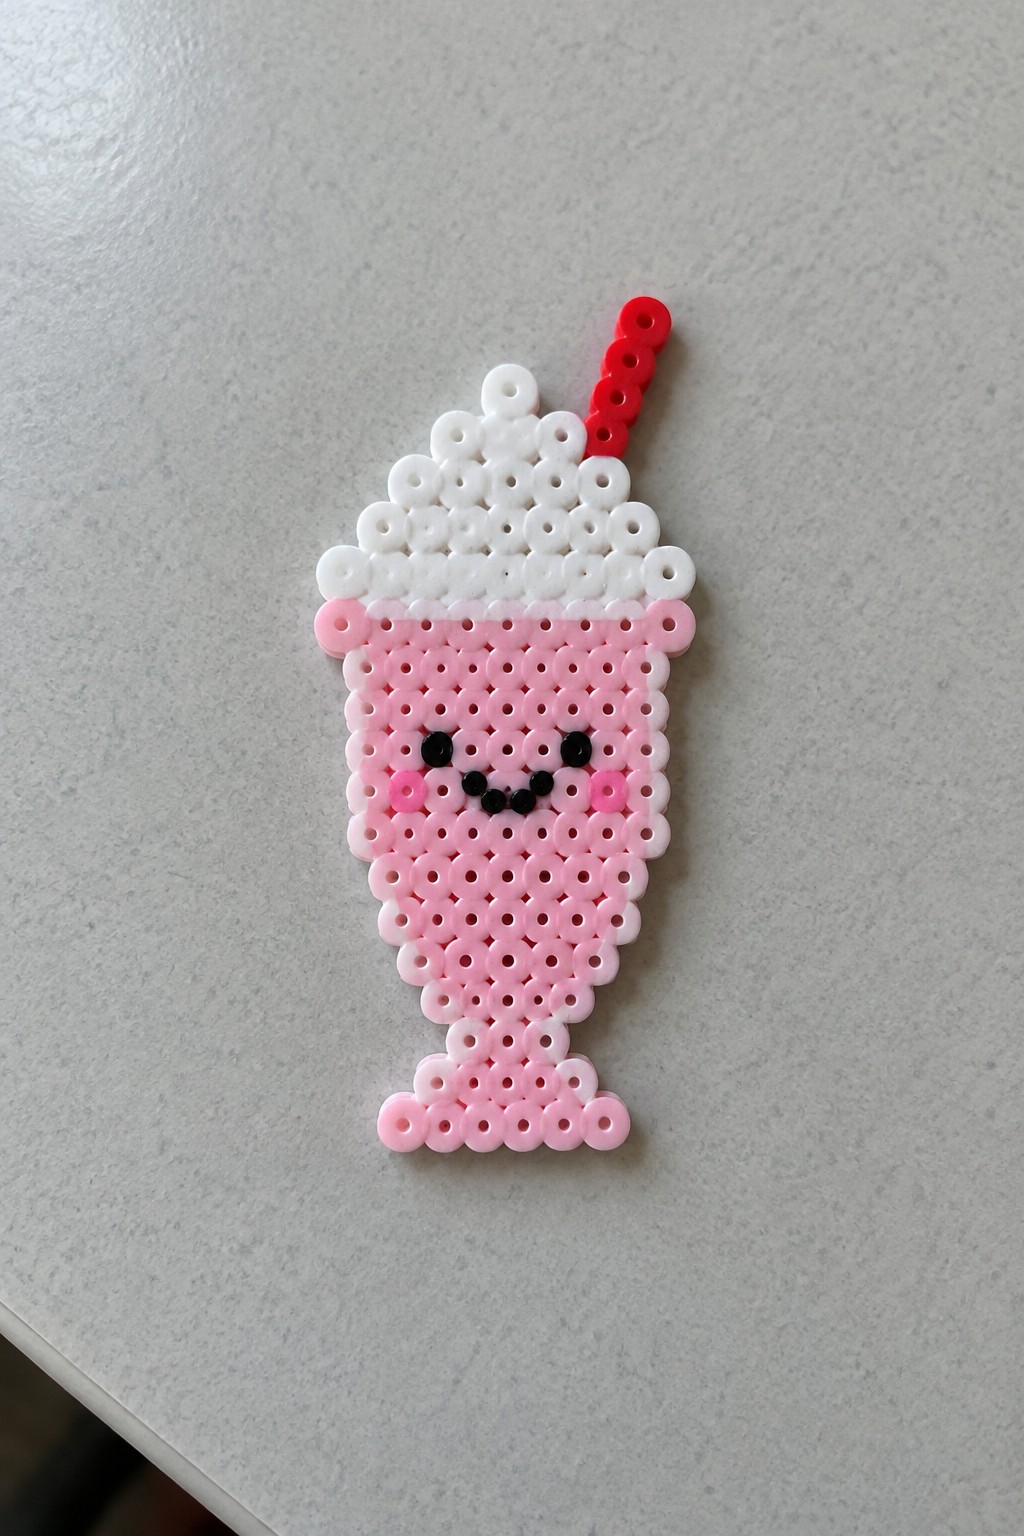
This Perler bead pattern creates a miniature milkshake using a block of pink beads for the drink, a rounded layer of white beads for the whipped cream, and a short vertical stack of red beads for the straw. Black beads form the eyes and smiling mouth while two single pink beads add simple cheeks, and the stepped silhouette clearly outlines the glass shape with its base. The color blocking separates each section so the overall form reads as a treat even at a small scale.
The compact layout works well for a food-themed collection since the same proportions can be repeated with different pastel colors to make matching flavors. Swapping the pink beads for another shade keeps the pattern recognizable while varying the set. A fused version could be attached to a magnet or used as a small display piece.
Pumpkin Pie
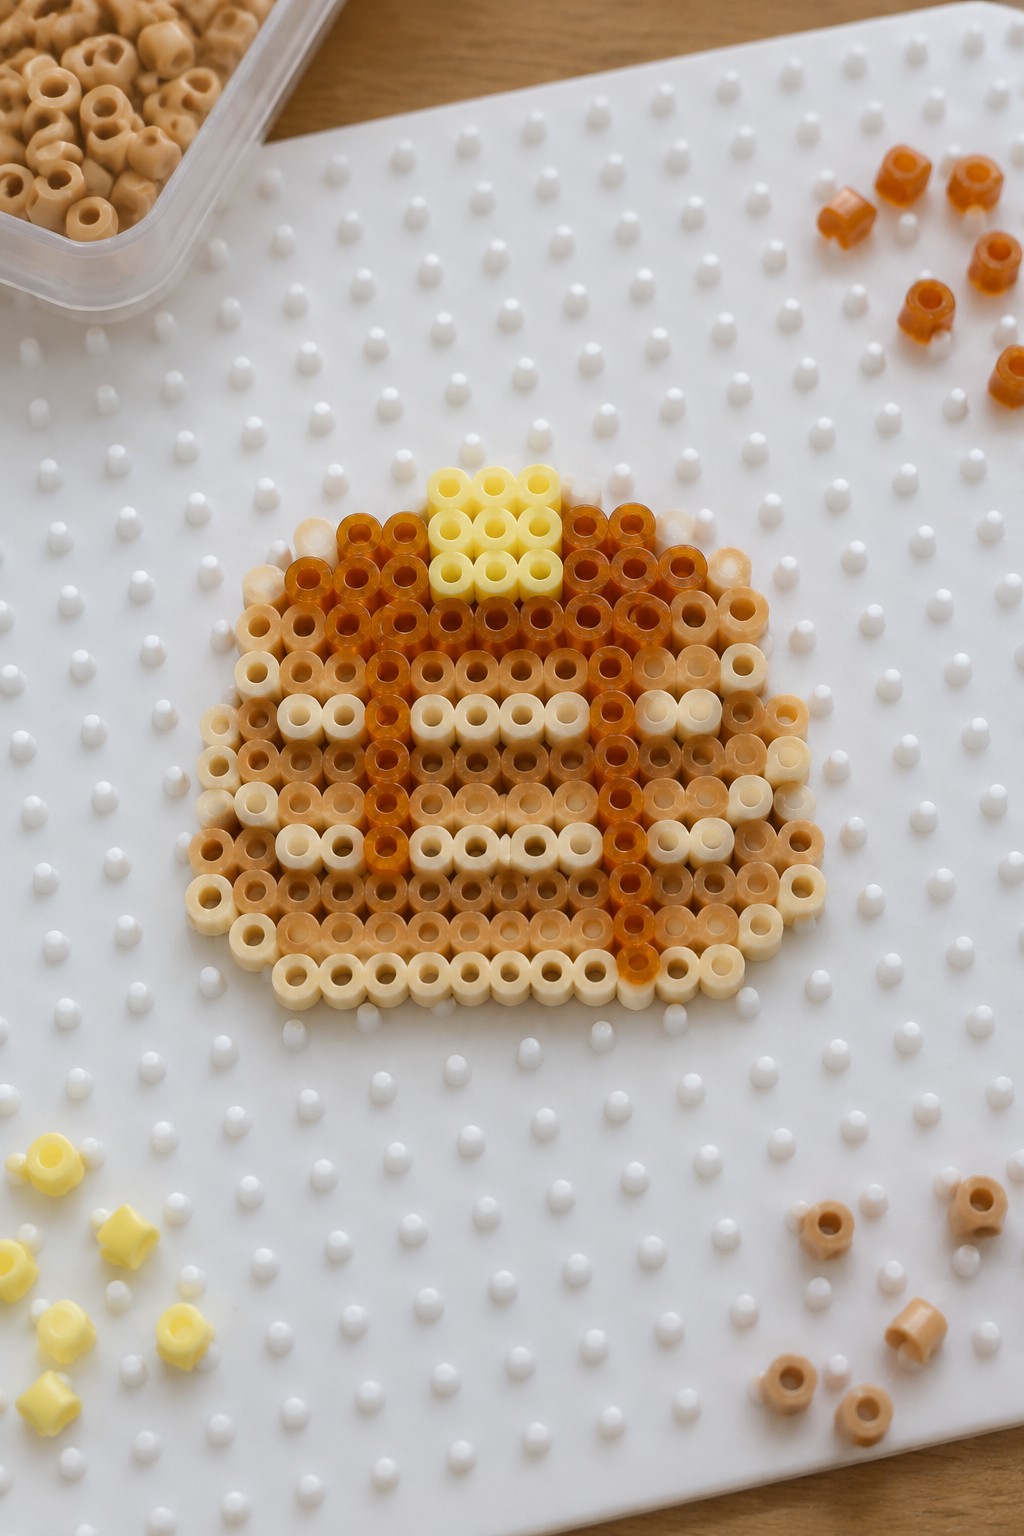
This Perler bead pattern forms a small pie shape on the pegboard using horizontal rows of beads in several orange and brown shades for the filling. A light beige row at the bottom creates the crust, while a compact yellow section at the top suggests a simple topping. The stepped edges and color blocking give the design a clear silhouette that reads as a miniature baked treat even at a small scale.
The limited color bands make the pattern easy to recreate or modify by swapping shades to represent different pie flavors such as apple or cherry. A finished fused piece would work well as a magnet or fall-themed bag charm. The same basic layout could be repeated with slight color changes to build a quick set of miniature dessert accents.
Croissant
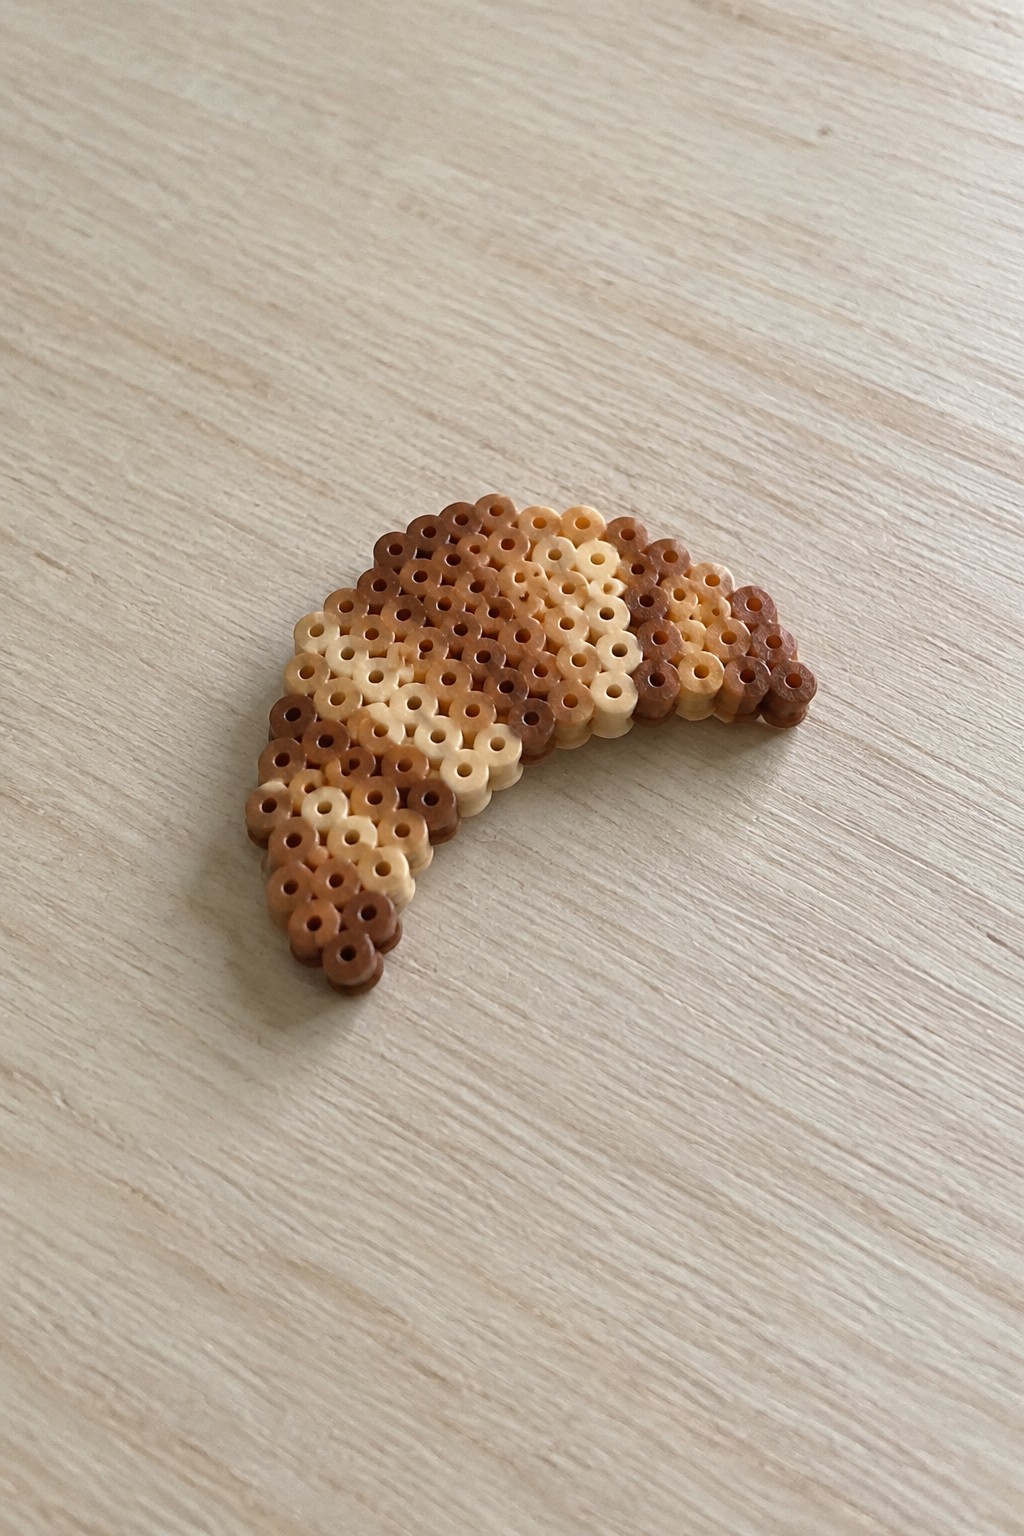
A croissant Perler bead pattern uses a curved crescent outline built from rows of beads in several brown and cream shades. The color progression from darker edges to lighter centers creates the look of baked layers, while the stepped outer shape suggests the folded pastry texture. This flat arrangement sits on a pegboard and relies on simple color blocking rather than fine details to stay recognizable at a small scale.
The small scale makes this useful for magnets or bag charms once fused. Changing the shell colors to deeper golds and tans would create a more toasted version of the same outline. A matching set could pair this croissant with other breakfast items using the same brown and cream palette for consistency.
Cute Hamburger Perler Bead Pattern
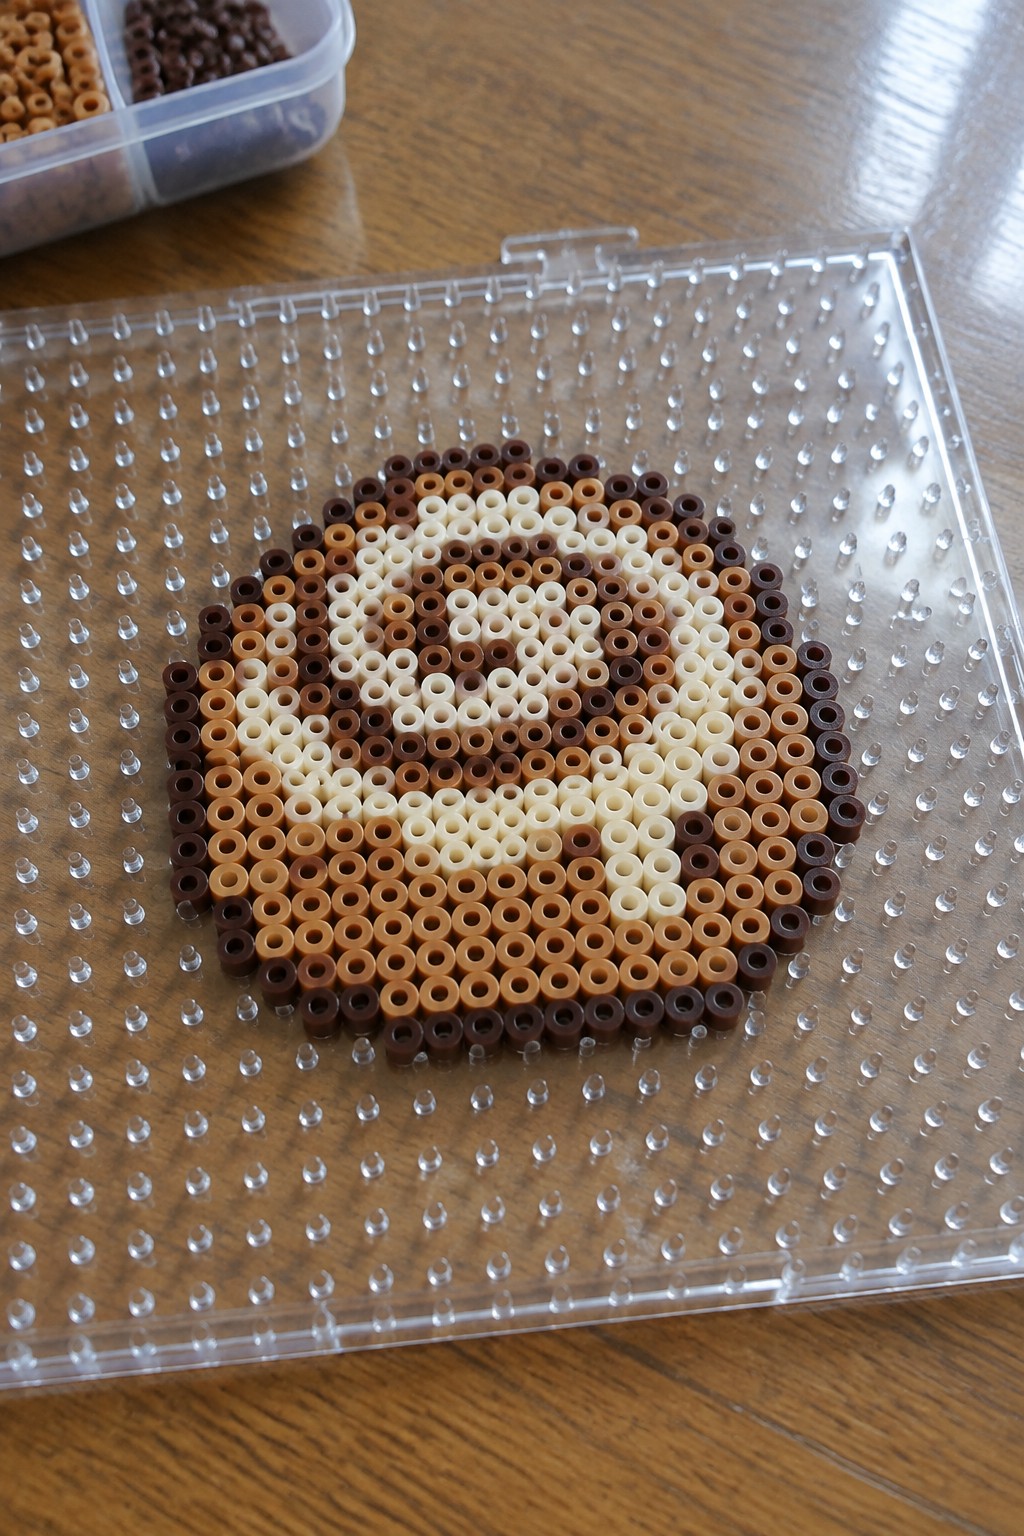
This Perler bead project forms a round hamburger using layered rings of dark brown, medium brown, tan, and cream beads to suggest the bun, patty, and other fillings. A central section of white and off-white beads creates simple facial features, while the outer dark brown beads define the overall silhouette on the pegboard. The color blocking and stepped edges produce a clear, readable food shape even at small scale.
The compact circular layout works well for miniature food themes and can be adapted by swapping bead colors to represent different toppings or sauces. A finished version could serve as a magnet, bag charm, or display piece alongside other food patterns. The same base shape could also be used to make a matching set of fast-food items with minor color changes.
Pastel Lollipop Perler Bead Pattern
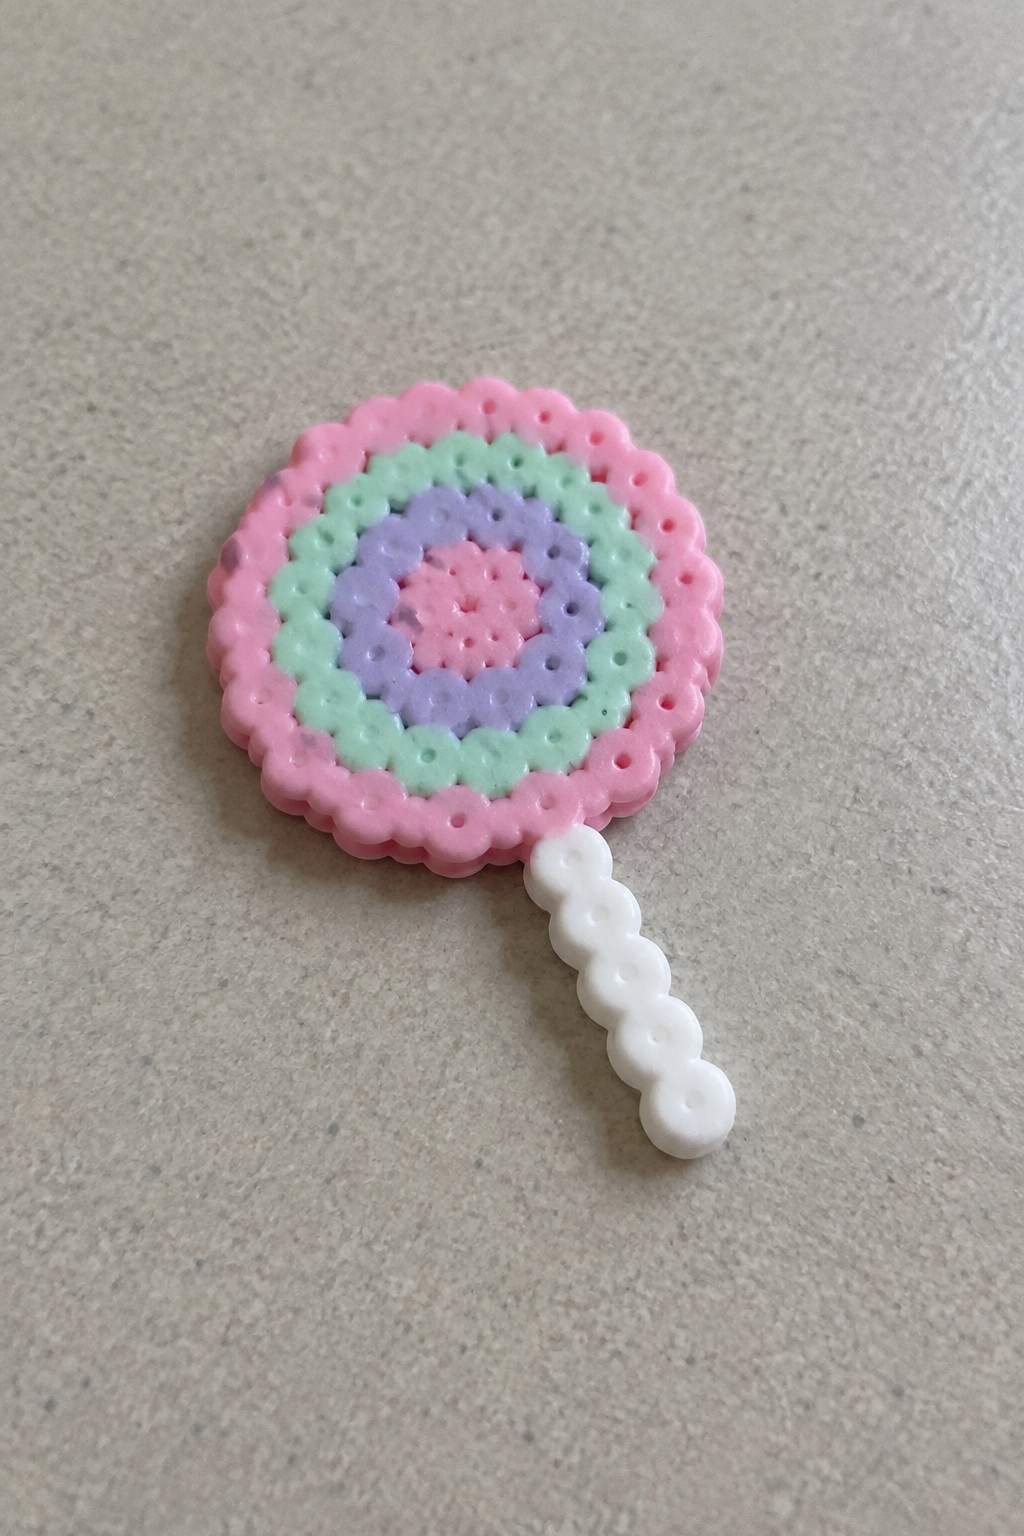
This Perler bead project creates a lollipop using concentric rings of pink, mint green, lavender, and a solid pink center. The scalloped outer edge and straight line of white beads forming the stick produce a clear candy shape on the pegboard. The circular color blocking with distinct ring layers makes the round motif easy to recognize even at small scale.
The compact layout works well for miniature food patterns and can be recreated with different candy-inspired color combinations. Swapping the ring colors lets you build a set of varied lollipops from the same basic structure. A finished piece this size could be used as a bag charm or small accent on a craft display.
Gummy Bear Perler Bead Design
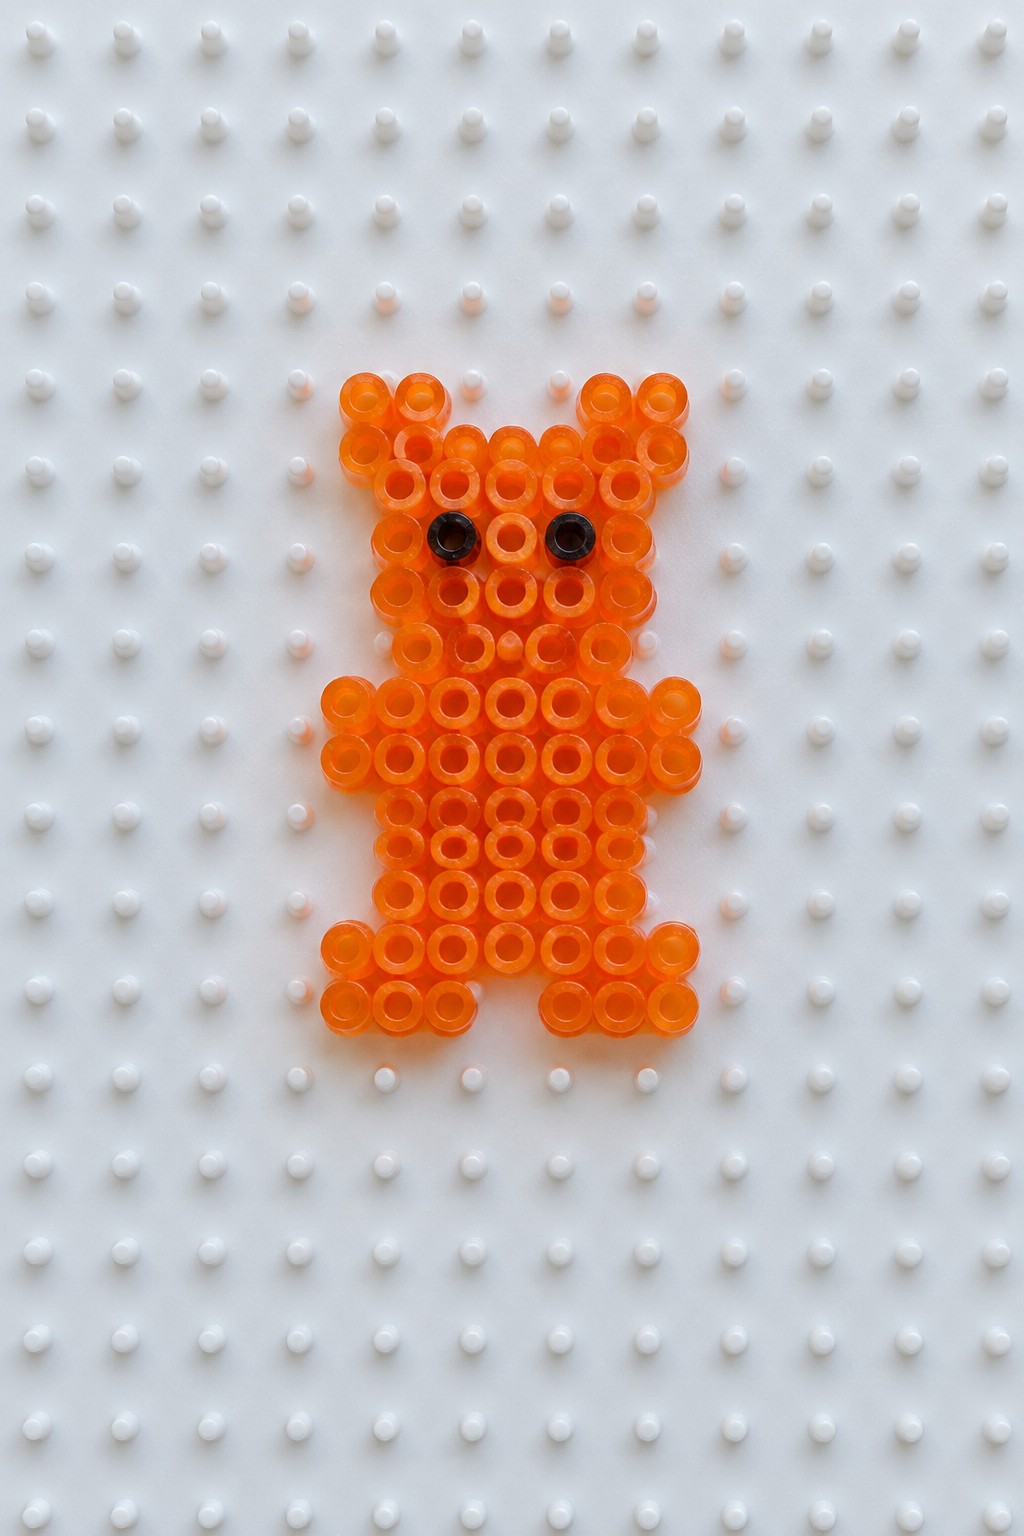
This Perler bead pattern creates a recognizable gummy bear using solid orange beads for the body and two black beads positioned as eyes. The design uses a symmetrical layout with rounded stepped edges to form the head, torso, arms, and legs in a single flat layer on the pegboard. Color blocking with one main shade keeps the plump candy shape easy to read while the small black accents define the face without adding extra detail.
The compact scale makes this pattern useful for a miniature food-themed set where multiple bears can be made in different candy colors like red, green, or yellow. The same basic silhouette works for quick color swaps or slight arm position changes to build a small collection. A fused version could function as a simple display accent or bag charm given its size and solid construction.
Macaron Earrings
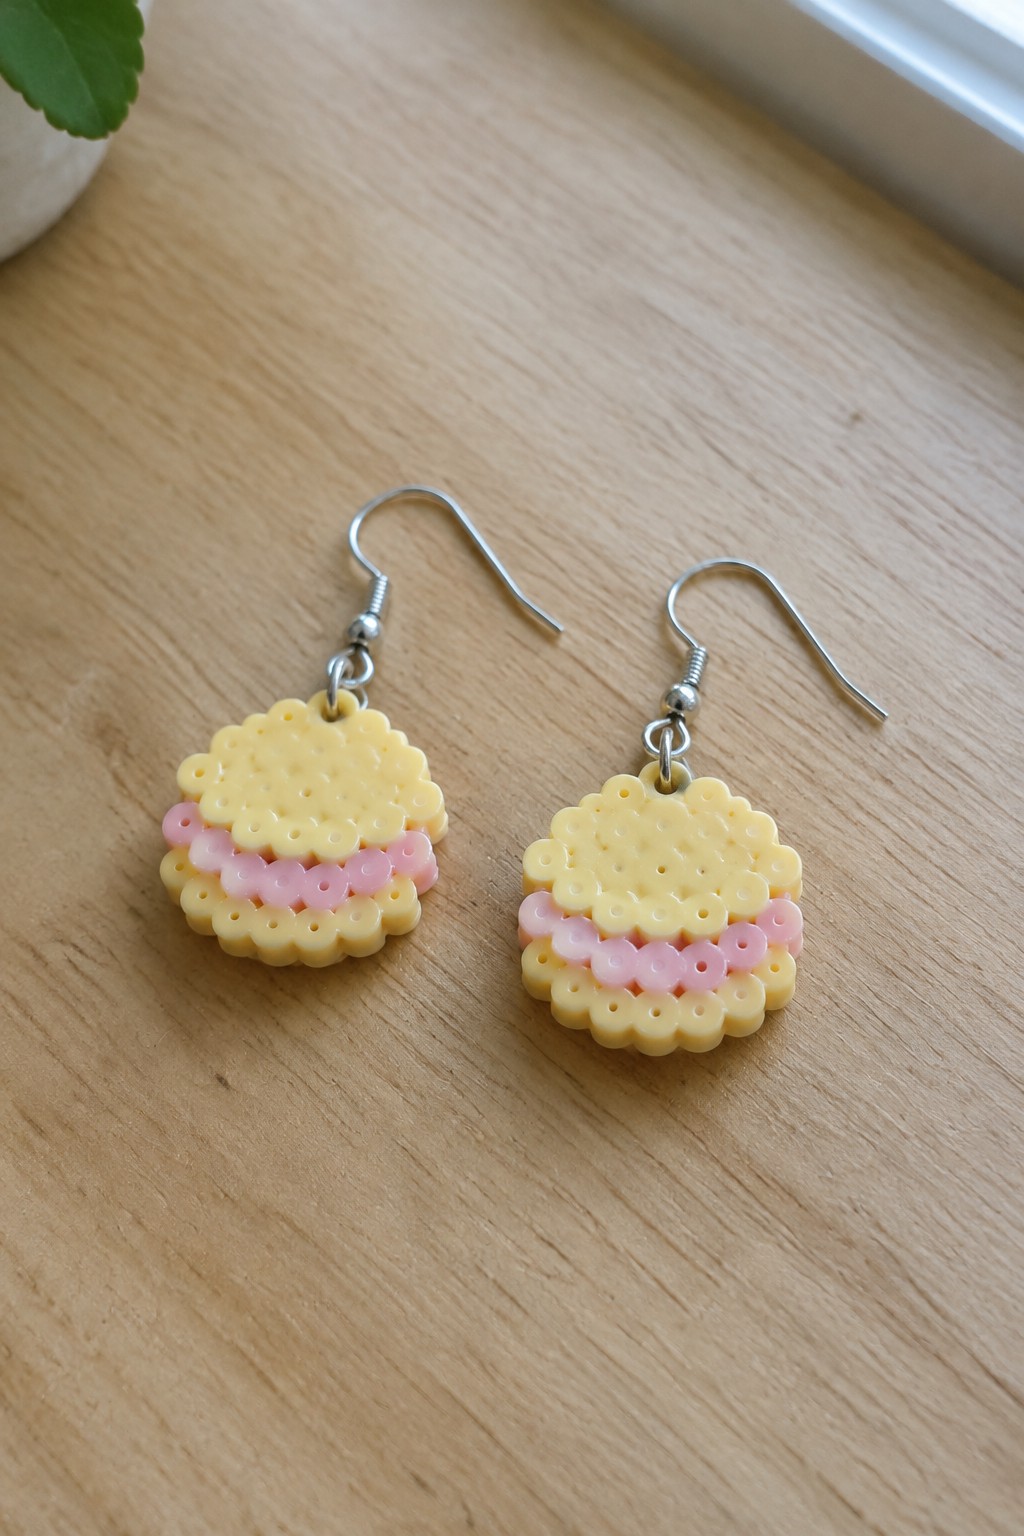
These Perler bead earrings consist of two round fused pieces with scalloped edges made from yellow beads that form the top and bottom cookie shells. A single row of pink beads runs through the center to represent the filling layer. Each finished piece attaches to an earring hook through a small jump ring at the top.
The compact round layout with clear color blocking makes the macaron shape easy to read at miniature scale. Changing the pink beads to brown or another pastel shade produces different flavor variations without altering the bead arrangement. The same pattern works equally well as a pair of earrings, bag charms, or small magnets once fused.
Chocolate Bar Pattern
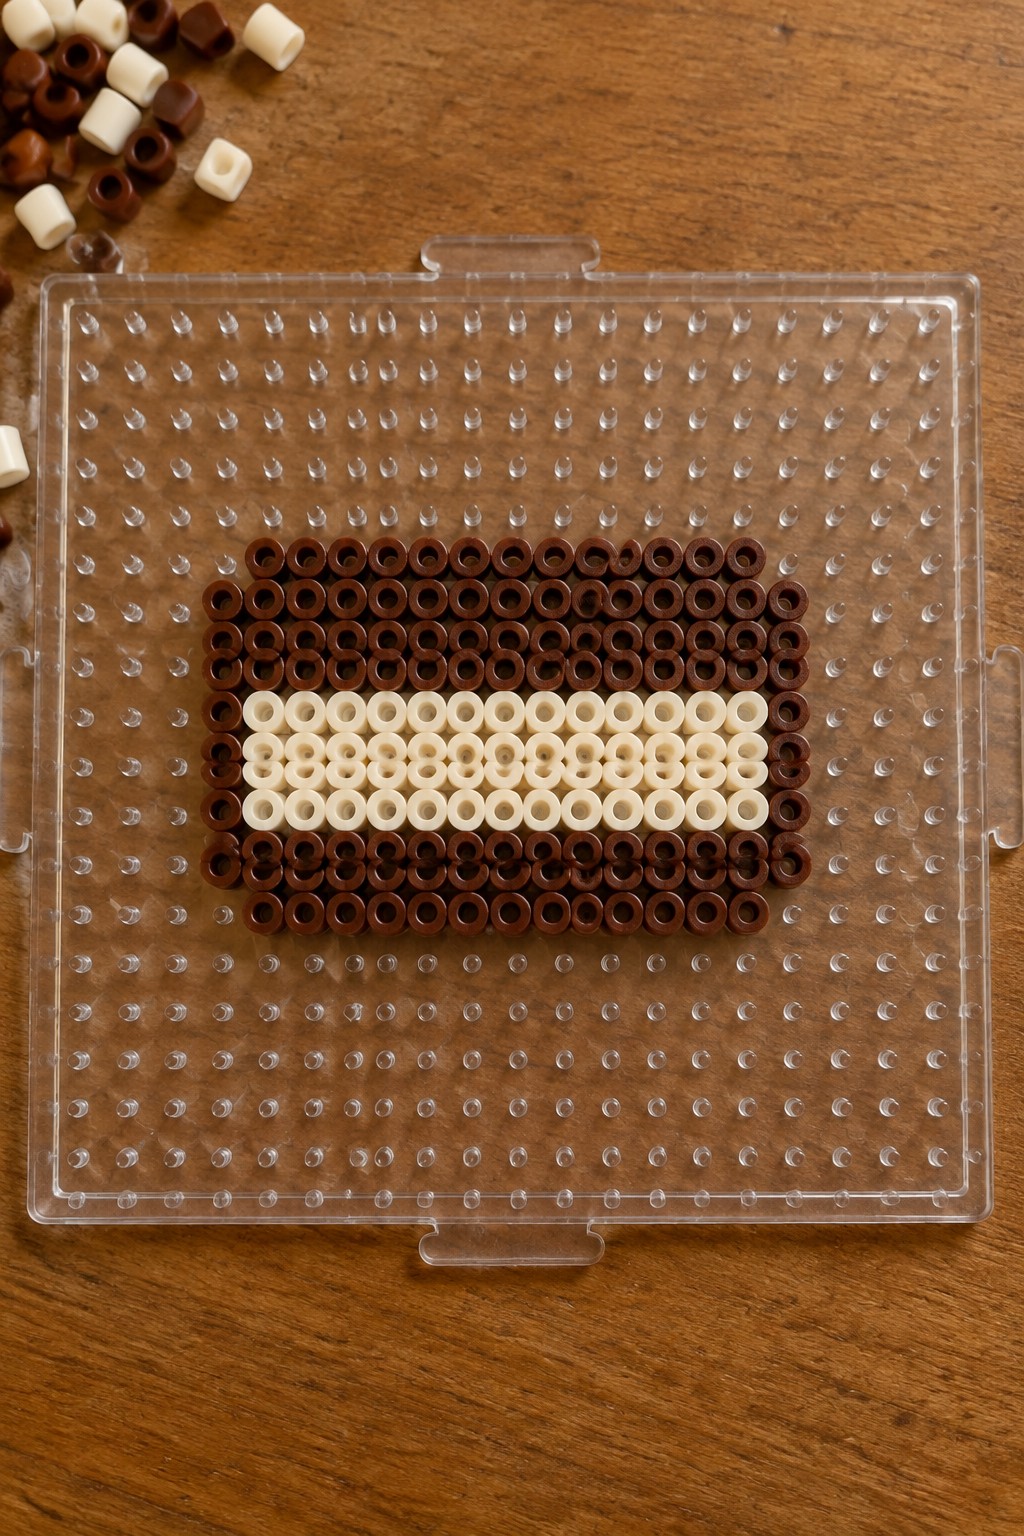
This Perler bead project creates a compact rectangular food motif using dark brown beads for the top, bottom, and side borders along with cream beads for a wide central stripe. The arrangement relies on straight rows and simple color blocking to suggest a layered chocolate bar or filled candy treat. The design stays flat on the pegboard and uses a limited palette so the rectangular shape reads clearly as a miniature treat.
The basic grid layout works well for quick color changes, such as swapping the cream beads for pink or caramel tones to suggest different fillings. Several versions in varied brown shades could be made to build a small set of different candy bars. The compact size keeps the pattern practical for adding to a larger food scene or using as individual decorative pieces.
Candy Corn Mini Treats
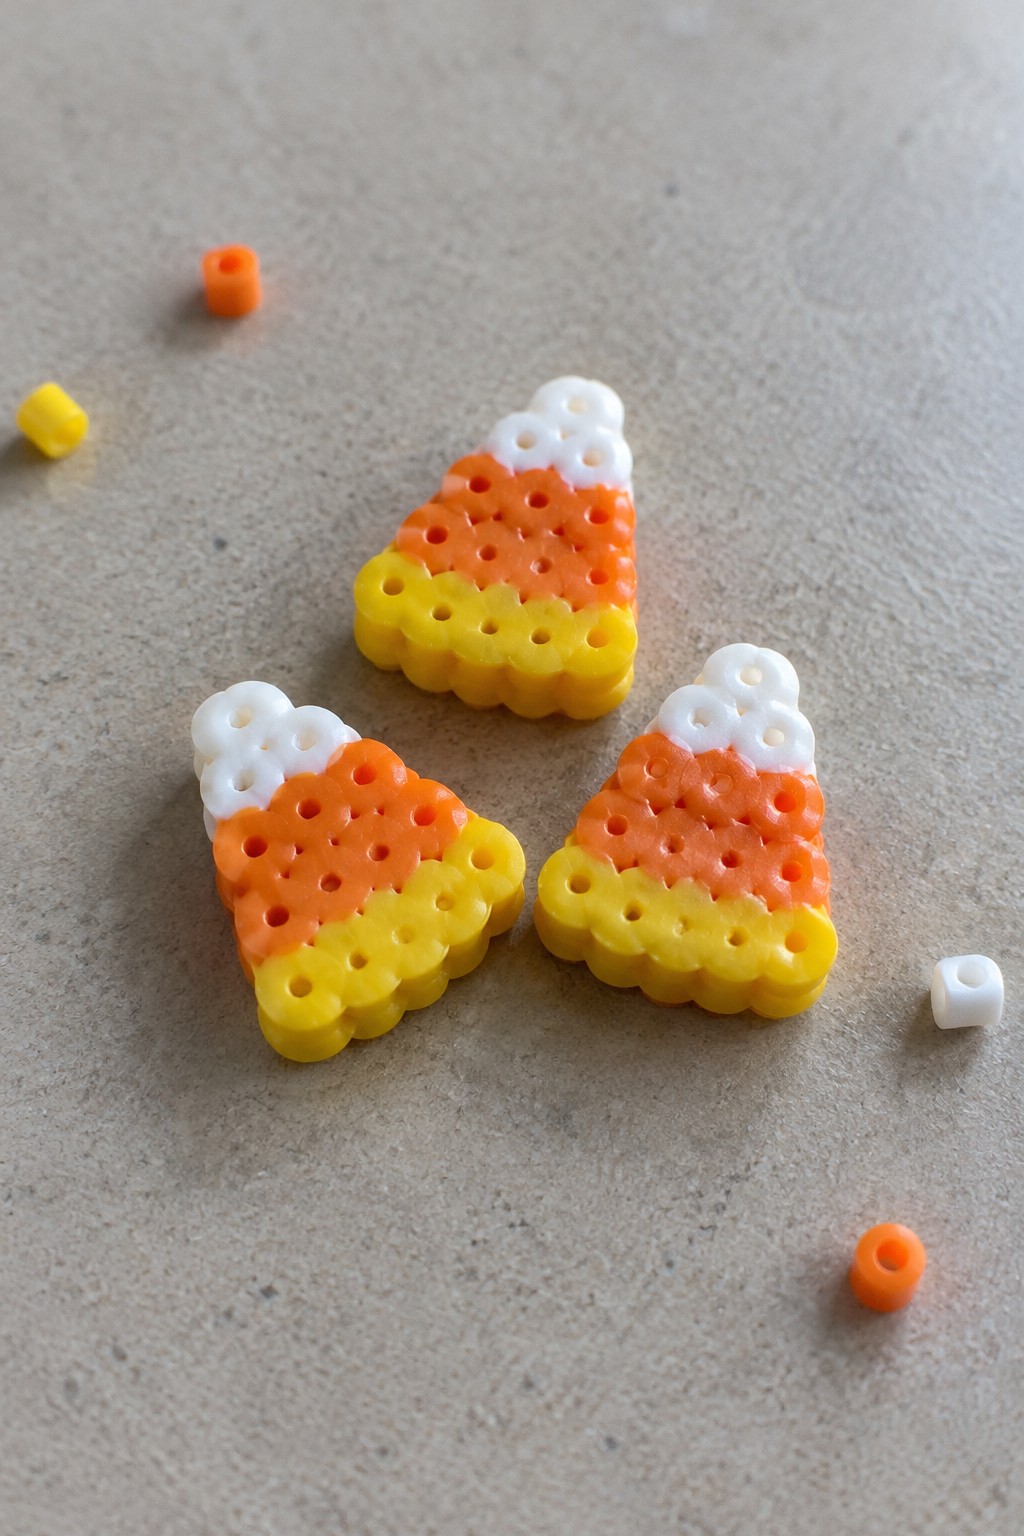
These candy corn Perler bead designs use three horizontal color bands of yellow, orange, and white to form the familiar triangular treat shape. The stepped bottom edges and rounded tops give each piece a clear silhouette while the color blocking keeps the food motif readable at a small size. Loose beads in matching colors sit nearby, showing how the pattern relies on simple placement rather than complex details.
The compact size works well for miniature food sets where only a few beads are needed to create a recognizable result. Changing the top band to a different shade could produce a new candy variation without altering the basic layout. Several versions made in the same color sequence can form a matching group for seasonal displays or small craft accents.
Cute Milk Carton Perler Bead Pattern
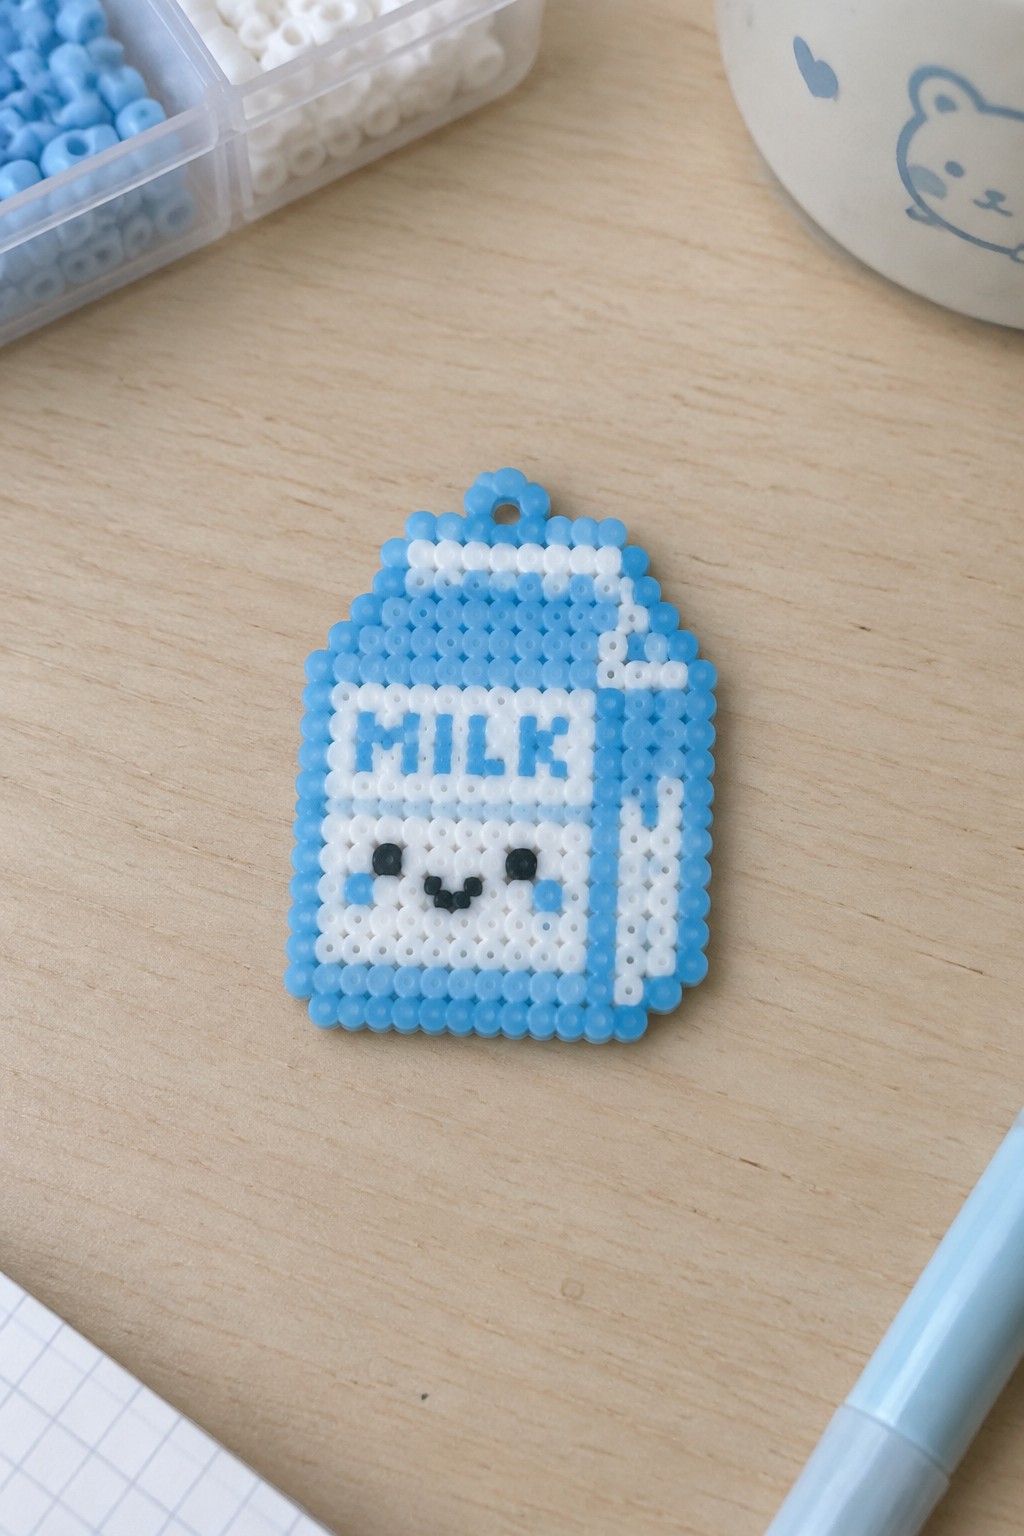
This fuse bead design forms a milk carton using light blue beads for the outer border and spout, white beads for the main body, and darker blue beads to outline the carton shape. The word MILK appears in the upper section with blue beads on a white background, while the lower half features a simple face made from black beads for the eyes and mouth plus a small blue cheek accent. The stepped edges from individual bead placement create the boxy carton silhouette, and a single bead loop at the top provides a hanging point.
The compact size and clear color blocking make this pattern easy to recreate or resize for different projects. Changing the border color to pink or brown could turn the carton into a juice box or chocolate milk variation while keeping the same layout. A finished piece with the hanging loop works well as a bag charm or ornament once the beads are fused.
Frequently Asked Questions
What supplies do I need to create these food Perler bead patterns? You will need Perler beads in a variety of colors that match the food designs, a small square or round pegboard for the miniature size, ironing paper or parchment paper to cover the beads, and a household iron set to medium heat without steam. A pair of tweezers helps with precise placement of tiny beads, and clear tape can secure the finished piece to a backing if you want to turn it into a magnet or pin.
How do I prevent the beads from warping or sticking together during ironing? Place the pegboard on a flat heat resistant surface and cover the design completely with ironing paper. Move the iron in slow circular motions for about 10 to 15 seconds, then check the beads. They should be fused flat but still slightly rounded on top. Let the piece cool fully on the pegboard before removing it to keep the shape stable.
Are these miniature food patterns suitable for children? Many of the simpler designs like strawberries or donuts work well for kids age six and older with adult supervision during the ironing step. Choose patterns with fewer than 50 beads to keep the project short and engaging. Always use non toxic Perler beads and keep the iron out of reach until the adult handles that part.
How can I make the finished food pieces look more detailed and realistic? Select slightly varied shades of the same color for shading effects, such as light pink and dark red beads for a cherry. After fusing, add a thin layer of clear nail polish or gloss varnish to the top surface to create a shiny, treat like appearance. Display several pieces together on a tiny plate or in a dollhouse setting to enhance the miniature scale.
What are some creative ways to use the completed Perler bead treats? Attach a magnet to the back so they can decorate a fridge or locker. String a few together with clear thread to make a playful keychain or zipper pull. They also work well as game pieces for a food themed board game or as cute package toppers when taped to a wrapped gift.
